Easy lemon curd mousse with lemon arlettes

mousse sharp

On tonight’s Bake Off the technical challenge was a biscuit called an Arlette which involves making a sort of puff pastry from scratch. Whilst on holiday in Devon two weeks ago I saw a Rose Prince dessert in a newspaper magazine which I thought sounded easy to make and tasty. I thereby unwittingly made these very same biscuits. (Well, sort of, anyway). I had no idea they were called Arlettes; I thought they were more of a Palmier (shows how much I know). Of course I didn’t make my own puff pastry and I suspect Paul and Mary would have issues with my thickness (and not having any cinnamon in them) but nevertheless they were delicious and went beautifully with the gorgeous lemon mousse, so, with a small amount of alteration, here they are. (Serves 4 – 6 depending on the size of your ramekins).

Ingredients for the lemon Arlettes:

  • 1 block or sheet of all butter puff pastry (blocks are usually 375g and sheets 320g)
  • The zest of 3 lemons, grated (Prince says 2 but I think they needed a bit more lemonyness)
  • 2 tbsp caster sugar
  • 1 egg, beaten

Method:

Preheat the oven to 200C

  1. Unroll your sheet of pastry, or roll out the pastry to ¼ cm thickness if you have a block. (Prince says ½ cm but I’m thinking about Paul and Mary here).
  2. Scatter 2/3 of the lemon zest and a generous tablespoon of sugar onto both sides of your pastry  – you can do this by putting half (of your two thirds) of the sugar and zest onto a piece of baking parchment, placing your pastry on that and then scattering the remaining half of your two thirds of lemon and zest on top of the pastry. (Sounds complicated; really isn’t).
  3. Roll up the pastry (from the short end) into a log shape, wrap it tightly in baking paper and chill in the fridge for at least 30 mins (or 10 mins in the freezer).
  4. Unwrap and cut the pastry roll into thin slices.
  5. Gently roll the slices even thinner using a rolling pin.
  6. Place the slices on a baking sheet covered with baking paper covered in half of the res of your zest and sugar.
  7. Brush them with beaten egg and then dust their tops with the remaining lemon zest and sugar.
  8. Bake until golden – about 10-15 minutes. Leave to cool on the baking sheet for a minute or two then cool completely on a rack.

Ingredients for the lemon curd mousse

  • 1 jar of the best lemon curd you can afford (about 320g. You could make your own, but then the recipe wouldn’t be ‘easy’)
  • 300g double cream, whipped
  • The zest of 1 lemon, pared (if you can. I find this very tricky. But it does look nicer if the peel is pared not grated. Though grated will of course be fine).

Method:

Fold the lemon curd into the whipped cream until the two are amalgamated, then spoon or pour it into pretty ramekins. Scatter the pared zest on the top and chill until needed. Serve with the beautiful Arlettes. Simple as. Yums! (ps your Arlettes should look thinner than mine!)

mousses 3

Blackberry ice cream

ice cream mix smartfixed

There are a lot of blackberry bushes at the back of my house. I’ve been eyeing up some early ripeners every time I get in and out of the car and this evening the children and I just couldn’t resist picking the first crop of big juicy berries. They were huge! I’ve wanted to make a blackberry ice cream for ages so set to as soon as we got back indoors. I used my preferred basic ice cream recipe. It’s a very straightforward formula – cold cream, cold milk, sugar, flavouring (vanilla, chocolate etc), churned in an ice cream maker (I use a Gaggia).  It makes a light and smooth ice (like an Italian gelato) which pairs exceptionally well with fruit. Actually it pairs well with anything, as it’s quite a basic background (I was going to say bland, but actually it’s not).  The chocolate version is dense and rich and moreish and the chocolate chip and salted caramel is one of my friend’s favourite ice creams (and Mr Arabella Cooks’ too). I’ll post that recipe in the near future, but for now, here is my magnificent, intense berry tang of a blackberry gelato. It’s lush.

Recipe

  • 500g blackberries
  • Caster sugar
  • Cassis (a blackcurrant liqueur. You can do without it if you don’t have any or don’t want to splash out on a bottle. I do use it all the time though so find it pays for itself, really. Makes a nice cocktail too)
  • Lemon juice (a good squeeze)
  • 200ml double cream
  • 200ml full fat milk
  • 130g caster sugar

Method:

  1.  Make a blackberry coulis: tip the blackberries into a pan (any will do – saute, saucepan or frying pan) with a good glug of cassis, a hard squeeze of lemon juice, 2 tablespoons of water and about 2 tablespoons of caster sugar. Cook on a medium heat till it bubbles a bit then simmer it gently until the berries break down and the sauce thickens a bit. About 4 or 5 minutes.
  2. Sieve the coulis into a jug, to remove the pips. Press down hard to get all the lovely sauce from the fruit and don’t forget to scrape the underside of the sieve. Leave to cool.

ice cream coulis

3. Make sure your ice cream maker is either cooled down if it has an internal cooling unit, or your bowl is chilled from the freezer if it doesn’t. (You can make this very easily without an ice cream maker if you don’t have one – just mix a can of condensed milk with 600ml of double cream and a bit of vanilla essence and whisk until it’s very, very thick. Mix the coulis into the cream, then put it into a loaf tin lined with clingflim and freeze. It won’t be quite as good as a churned version but thoroughly delicious all the same).

4. Mix together the milk, cream and sugar in a separate jug or bowl, then pour it slowly into the cooled coulis.

ice cream mix

5) Pour the delicious mixture into your ice cream maker and churn until thick. Then transfer to a tub and freeze until you can no longer resist eating large spoonfuls whilst standing at the freezer with the door open (yes I do). Yumbles.!ice cream last

Gluten free fish and chips: tempura battered fish with triple cooked chips

toby chips 3

We’ve been on holiday to Devon. We had three lots of friends to stay at various points and I (happily) did more cooking than I ever remember doing before in a two week period: roast chicken with mash, black pudding and orange glazed carrots, salted caramel chocolate cheesecake, chicken and prawn paella, raspberry ripple and pistachio parfait, dark chocolate mousse, bbq Moroccan lamb burgers, tabbbouleh with pomegranate and mint, freekeh with coriander and feta, lemon mousse and lemon pastry biscuits, Mexican pulled chicken with homemade coleslaw and bbq corn on the cob, hot chocolate mousse (the one I made on Masterchef), meatballs with tagliatelle, chocolate, nougat and pistachio semifredo, cheesy pasta bake with the leftover mince from making the meatballs, Korean Bulgogi chicken skewers, garlic prawns, Chinese Char Siu stiky ribs and rice noodle salad with sesame dressing, gluten free fish and chips, chocolate cornflake crispy cakes and gluten free birthday cake (Mr Arabella Cooks and I have the same birthday and it fell on the penultimate day of the holiday).

The brilliant joviality of the evenings and far too much wine) meant that I stupidly forgot to photograph much of the food. I also nearly sliced off the tips of two of my fingers whilst making the coleslaw. There was a disproportionate amount of blood (rivers of the stuff). The friends staying that night assured me this was because I’d thinned my blood with alcohol. Luckily that also served to numb the pain and anyway it wasn’t really serious so I didn’t need to have them stitched. Also luckily I did have the wherewithal to start taking photos at around the lemon mousse evening so I do at least have a few recipes to share with you. The one I got the most excited about was the fish and chips because Delilah (the coeliac) had been asking if she could have some fish and chip shop fish and chips (which of course she can’t) so I had promised to make her some at home. I found a cute retro chip serving kit in John Lewis to authenticate the experience and she couldn’t get enough of them. Triple cooking chips makes them gorgeously crispy on the outside and fluffy and light on the inside.

lilah chips 3      lilah chips 5

She was less enthusiastic about the fish because she is without doubt the fussiest eater on the planet, but she gallantly ate almost a whole goujon before admitting she’d probably prefer a gluten free mass produced fish finger. Mr Arabella Cooks and I had a whole battered fillet each however and they were delicious. Gluten free flour works so well for this because you don’t actually want any gluten in your batter. Recipes for it warn you not to overwhisk the mixture and release the gluten in the flour as that would make it heavy and tempura batter needs to be fairy light and crispy. Frankly I don’t know why everyone doesn’t just use gluten free flour in the first place. Don’t be put off that this isn’t a big butch beer batter – the lovely light tempura batter is gorgeous.

Gluten free tempura battered fish ingredients (serves four):

  • 4 white fish fillets (sustainably sourced cod, pollock etc)
  • Oil for frying (choose one with a high smoke point like sunflower or groundnut)
  • 100g corn flour
  • 150g gluten free plain flour
  • 10g baking powder
  • 1/2 a teaspoon of table salt
  • enough iced sparkling water to make a batter that will coat your finger (or more importantly your fish or whatever you want to fry. Don’t deep fry your finger, obviously). About 150ml.

Method:

  1. Heat your deep fat fryer, or oil in a heavy bottomed pan (no more than half full) on the stove top.
  2. Mix the flours, salt and baking powder together in a large bowl.
  3. Slowly add the iced water, stirring gently (DO NOT overstir).
  4. Make sure your fish fillets are bone dry. When the oil has reached 180ºC dip the fillets one by one into the batter. Make sure they are completely covered. Lower each fillet slowly into the hot oil. When the bottom of the fillet is submerged in the oil, wave it around from side to side, gently, for a few seconds, before letting go. Don’t splash yourself.
  5. The fillet is cooked once it’s turned a beautiful golden brown, usually about 3-4 minutes. Don’t overcrowd your pan or fryer as that will lower the temperature of the oil (which needs to stay nice and hot at 180ºC). I did all mine separately. Use a slotted spoon to remove the fillets from the hot oil once cooked if using a pan and drain on kitchen paper.

Triple cooked chips ingredients (serves four):

  • 800g Maris Piper potatoes, peeled and cut into chips (roughly 2 × 2 × 6cm)
  • Groundnut or vegetable oil for frying
  • Salt

Method:

  1. Rinse the chips for a few minutes to remove the starch
  2. Put the potatoes into a large saucepan with enough cold water to cover them. Bring the to the boil and simmer for about 10 minutes until tender. Heston Blumenthal recommends 20-30 minutes until the potatoes are almost falling apart but I couldn’t wait that long.
  3. Carefully drain the potatoes and dry them on a cooling rack (not on kitchen towel or they’ll go soggy). Put them in the freezer for as long as you can (Heston says an hour; I didn’t have an hour more like 20 minutes and they still worked).
  4. Heat a deep-fat fryer or a deep pan no more than half filled with oil (around 10 centimetres) to 130ºC.
  5. Fry the chips in small batches until crisp but not coloured (about five minutes), remove from the oil and drain on kitchen paper.
  6. Put the potatoes back onto the cooling rack and back in the freezer. Again, Heston says for an hour. I didn’t have that long (who starts cooking chips three hours before they want to eat them?). Half an hour would be good. I think I waited about 10 minutes.
  7. Heat the oil in the fryer or pan to 180ºC and fry the chips until golden (approximately seven minutes). Remove from the oil, drain on kitchen towel and sprinkle them with salt. Mr Arabella Cooks had some cider vinegar on his too. Eat. Yummo!

lilah chips 4    toby chips 2

Gluten free mocha chocolate ice box cake

cake 3

A friend of mine is poorly so I made her a cake. This is a spectacularly easy way of making an impressive and delicious gluten free dessert, but it can be gluten free or gluten containing in the blink of an eye. It just depends what kind of biscuits you use. It’s based on the principle of an Italian tiramisu – flavoured whipped cream layered with biscuits. You put it in the fridge overnight and it hardens the cream and softens the biscuits (into ‘sponge’) et voila: cake/pudding/breakfast/whatever. Top it with something delicious and yum to the max, frankly.

Ingredients:

  • 4 packets of Maryland double choc chip cookies (if you don’t need to go down the gluten free route) or 5 packets of gluten free double chocolate chip biscuits (Kent of Fraser or Doves are good) to make it gluten free.
  • 600ml double cream
  • 100g caster sugar
  • 50/60ml of cold espresso coffee
  • 1 teaspoon of good vanilla essence
  • 350g mascarpone
  • 2 tablespoons of cocoa or cacao powder
  • Optional extra if not making for children: (60 mls Kahlua)

Method:

  1. In a large bowl, whisk together the cream, mascarpone, sugar, cocoa/cacao, cold espresso and vanilla (and Kahlua if using), until it forms firm peaks.
  2. Take a high sided, loose bottom cake tin (you don’t need it to be springform) and put a layer of biscuits on the bottom. You’ll need to break some to make the jigsaw of biscuits fit with as few gaps as possible (it takes practice; by the last layer I was brilliant at it).
  3. Spread a thin layer of the cream mixture over the biscuits. Put another layer of biscuits on top (again assembling it like a jigsaw) followed by another layer of cream and so on until you have run out of biscuits and cream/come to the top of the tin. You should end up with around 5 layers, with the top layer being cream.
  4. Cover with clingfilm and refrigerate overnight (or all day if making in the morning to serve at night. It needs at least 6 hours).
  5. When ready, take it out of the fridge and run a small sharp knife around the outside of the cake and push the bottom up and out (I used Mr AC to help me with this). On the top I put some caramel and Belgian chocolate popcorn (for texture and flavour) and then shaved some Lindt Swiss Classic Double Milk chocolate bar (which is my current favourite cake decorating secret) with a vegetable peeler on top of that. I should mention though that the Lindt chocolate is not gluten free (my friend didn’t need a gf option) so if you can’t have gluten use something else to decorate).
  6. Serve cold, in wedges.
  7. Store it in the fridge and eat quickly as it won’t keep for very long (no matter though as you’ll want to eat it all immediately anyway because it’s Y U M!).

cake 4   cake 5

Father’s Day tea: Nana Christine’s cheese scones; strawberry and brown sugar pavlova

scones 7

I went out last night for the third evening in a row. As it was Father’s Day today I used the opportunity to make it up to my forbearing husband by making him some very nice things to eat. I did my best ever roast chicken for lunch (thyme butter in-between the breast meat and skin, and half a lemon in the cavity; duck fat roast potatoes) and in the afternoon we had high tea with grandparents: cheese scones and a brown sugar, chestnut and strawberry pavlova.

The Nana Christine in the title is my sister’s mother in law. She is an amazing baker and her cheese scones are delicious. The secret, she says, is not to roll out the dough with a rolling pin but simply flatten it using the heel of your hand. This helps the scones rise on their own and keeps them light. It definitely works – I’ve made them time and time again and they always turn out beautifully. They have a high proportion of cheese in the mix which I think is also key. I’m often disappointed by how un-cheesy a cheese scone can be. I also add a sprinkle of finely grated cheese on top of each scone. I think it looks appealing and makes them taste even better. My two year old was going to eat these so I didn’t add any cayenne pepper, but it’s customary to do so and makes them taste a little ‘tingly’, which I like, so I’m putting it into the recipe as an optional extra.

The pavlova is a Mary Cadogan recipe which I tweaked only very slightly.  It was absolutely divine and my best pavlova ever (I do say “This is my best ever”  rather often; “You say that every time you cook something” replies my husband; but this time, honestly, it was the truth). The brown sugar gives the meringue a gorgeous caramel flavour and the cornflour and vinegar give it a fabulously gooey middle. I am trying very hard not to go back to the fridge and polish off the whole lot.

Cheese scones Ingredients (makes 16):

  • 285g self raising flour
  • 85g butter (cold)
  • 230g mature cheddar, grated, plus a little extra for the top
  • 180ml milk
  • salt and pepper
  • Pinch of cayenne pepper (optional)

Method:

Preheat the oven to 180 C (fan)

  1. Mix the flour with the cayenne pepper if you’re going to use it (you can sift them together; you don’t need to sift if you’re not going to add the cayenne)
  2. Cut the butter into cubes and rub it into the flour with your fingertips until it resembles breadcrumbs
  3. Add a pinch of salt and a twist or two of black pepper
  4. Stir in the cheese with a metal fork, so that it’s completely coated with flour. You don’t want the cheese to melt so don’t use your hands.
  5. Add the milk slowly and mix into a stiff dough with a knife or fork. You may not need all the milk; you may find you need a teeny bit more. You need to use you judgement here –  you want a stiff, not gooey dough, but one that you can work with and won’t fall apart.
  6. Turn the dough out on to a floured surface and knead it lightly.
  7. Flatten out the dough with the heel of your hand, to about 3cm high. No lower or the scones won’t rise enough.
  8. Use a round cookie cutter (mine is 6cm diameter), cut out your scones and place on baking parchment on a metal baking tray. (When you have cut as many as you can, knead the remaining dough together again and repeat…)
  9. Glaze them with milk and sprinkle some grated cheese on top of each scone pavlova 5
  10. Bake in the oven for 20 minutes until they are a deep golden colour.
  11. Remove from the oven and cool on a wire rack, or just eat them immediately, with a large swipe of salted butter. Y U M!

          scones 8

Variation: To make fruit scones replace the cheese with 55g of sugar (golden caster is nice) and 55g sultanas (and obvs leave out the salt, pepper and cayenne too). Add the sugar and sultanas after you’ve rubbed in the butter; dip your cookie cutter in flour before cutting out each scone (to stop it sticking); don’t twist the cutter but bang your hand on the top and then pull it out cleanly; bake near them in a slightly hotter oven – 200C, for 10-15 minutes until golden. You could also use a mixture of milk and lightly beaten egg (about 100ml of milk and 2 medium eggs; reserve a little of the egg to glaze the top of the scones before baking).

Strawberry and brown sugar pavlova

pavlova 2

Ingredients:

For the pavlova

  • 2 tsp vinegar, any type but not malt. I used white wine vinegar.
  • 2 tsp vanilla extract
  • 2 heaped tsp cornflour
  • 4 large egg whites
  • 100g light muscovado/light brown sugar
  • 100g golden caster sugar
  • 25g whole (not blanched) hazelnuts bashed up a bit (I whizzed mine in my mini blender for a few seconds; you don’t want crumbs but slightly broken up is nice)

For the topping:

  • 600g strawberries
  • 3 tbsp cassis (blackcurrant liquer)
  • 3 tbsp pomegranate molasses
  • A tablespoon of icing sugar
  • 2 tablespoons of caster sugar
  • About 600ml of double cream
  • Some toasted flaked almonds (roughly 30g; buy flaked almonds and put them onto a baking sheet in the oven until you can smell them – about 5 mins or so, and they are slightly darkened)

Method:

For the pavlova

  1. Preheat the oven to 140C/fan 120C. Cut off a piece of baking parchment to fit your baking sheet; using a pencil draw round a 20cm cake tin onto the baking parchment; turn the parchment over (so you don’t get pencil on your pavlova).
  2. Add the vinegar and vanilla essence to the cornflour, gradually, to make a paste.
  3. Whisk the egg whites until stiff. I used a freestanding electric mixer but you can easily use a hand held electric whisk.
  4. Gradually whisk in the sugars, adding a little paste with each addition, until a thick marshmallowy meringue is formed. Don’t overwhisk your egg whites or the mixture will become grainy and you’ll knock all the air out. It will still taste great but won’t be quite as high (I actually over whisked mine a little, and it was still delicious, so don’t get too hung up about it).
  5. Spread it out in the circle on the baking sheet, swirling the knife (a palette knife is a good implement to use) to make peaks.
  6. Scatter over the hazelnuts
  7. Bake for 1 hour, then turn off the oven and leave it to cool. (I made mine the night before and left it in the oven overnight).

For the topping:

  1. Make a coulis by whizzing up 100g strawberries and a tablespoon of icing sugar with a hand blender, in the small bowl of a food processor or in a mini blender. Sieve the sauce into a bowl and add the cassis and pomegranate molasses.
  2. Whip the cream with the caster sugar, softly. (It is absolutely essential not to overwhip the cream). Top and slice half the strawberries and fold them into the cream.
  3. Swirl 3 tbsp of the coulis through the lightly whipped cream.
  4. Put the pavlova onto a large, flat plate. Spoon over the cream, scatter on the remaining strawberries (I left some whole, halved some with their tops still on and topped and halved the rest) and the toasted flaked almonds and drizzle with the sauce. Serve to some very lucky people indeed. Yummmmm!

pavlova 3

Banana and pecan cupcakes with dates, chocolate chips and cream cheese frosting

cupcakes 08     

My daughter played her violin in a concert at a lovely church this afternoon and we were asked to take along a contribution for the tea afterwards. I had a lot of over-ripe bananas in the freezer and was going to make a banana loaf, but cupcakes always go down well with the children (and parents actually) at these things so I decided to make banana cupcakes. The addition of the crème fraiche and the dates makes the cakes very moist and sweet (mmmm) so a perfect foil for this is a slightly tart cream cheese frosting. The frosting recipe I used turned out rather runny, but as luck would have it the very lovely and talented Ketta Shimmin of Flossi Pops Cakery was also at the concert and she told me the secret to perfect cream cheese frosting (see below). Chopped salted peanuts added a final salty kick and (shop-bought) chocolate stars made them look very pretty.  They were all devoured in minutes (and when asked, Mr AC said they were “very nice”).

Ingredients (makes approx. 16):

  • 250g self raising flour
  • 1 teaspoon of baking powder
  • 100g unsalted butter at room temperature
  • 150g caster sugar
  • 2 large eggs
  • 2 heaped tablespoons of greek yoghurt or crème fraiche (I used reduced fat)
  • 4 or 5 over-ripe bananas, mashed up
  • 1 teaspoon of vanilla extract
  • 1/4 of a teaspoon of salt
  • 1/2 a teaspoon of cinnamon
  • 70g chopped pecans
  • 4 or 5 dates (I used Mejdool) chopped up to the size of raisins, or smaller
  • 50g good quality dark chocolate chopped up quite small (or use chocolate chips)

banana cupake ingredients

Method:

Pre-heat the oven to 180c (160c fan). Line two cupcake tins with paper cases.

1) Using a hand-held electric whisk or free-standing mixer, cream together the butter and sugar on a medium speed until light and fluffy, about 3 minutes.

2) Add the eggs one at a time, mixing thoroughly after each addition

3) Add the crème fraiche/yoghurt, mashed bananas and vanilla and mix in well.

4) In a separate bowl, sift together the flour, baking powder, salt and cinnamon.

5) Mix the wet ingredients into the dry using a spoon or spatula.

6) Fold in the the pecans, chocolate and chopped up dates.

7) Divide the mixture evenly into paper cupcake cases – a mechanical ice cream scoop comes in handy for this if you have one.

cupcakes 3

8) Bake in the oven for 25 minutes or until the cakes are springy and a cake tester or skewer inserted into the middle of a cake comes out clean.

9) Remove from the oven and leave to cool in the tin for about 10 minutes, before removing and placing on a cooling rack.

cupcakes 4

For the frosting:

  • 200g butter
  • 200g cream cheese (fridge cold)
  • 450 icing sugar, sifted

Cream together the butter and sifted icing sugar (I have a freestanding mixer which makes this dead easy but a hand held electric whisk does the job just as well). Stir in the cream cheese straight from the fridge using a spatula or spoon; DON’T USE THE MIXER OR WHISK – that is what makes the icing go runny…Stir it well to ensure there are no lumps, then put the frosting into a piping bag with a large serrated nozzle and pipe onto the cooled cupcakes with a swirly flourish. (NB a stint in the fridge will also make a too runny frosting harden up a bit, if necessary).

Decorate as you wish – I used shop bought chocolate stars which the children loved and some chopped up salted peanuts for an extra flavour dimension. Yum!

cupcakes 9 cupcakes 8 cupcakes 06

Salted caramel chocolate tart

tart 2  tart on table

As promised, the salted caramel chocolate tart I made for last week’s party. It’s a recipe very dear to my heart as it got me onto Masterchef. I made a trio of chocolate puds for my filmed audition – salted caramel dark chocolate tart, milk chocolate mousse layered with mascarpone cream and a basil infused raspberry and white chocolate cheesecake (the cheesecake didn’t set so I served it upside down in an espresso cup):

qualifing dishes

I’ll post the recipe for all three at a later date, but in the meantime here is the salted caramel chocolate tart. The recipe comes from Rachel Allen (famous Irish TV cook; think blond, Irish Nigella) and is difficulty level ‘high’. But so, SO worth it. Hell it’s a Masterchef level dish so if you really want to impress anyone, this is definitely worth doing. (I’ve yet to come across anyone who didn’t swoon with delight upon eating it).

Ingredients:

For the sweet shortcrust pastry

  • 200g plain flour
  • 100g chilled butter (cubed, plus extra for greasing)
  • 1 tablespoon of icing sugar
  • a lightly beaten (large) egg

For the caramel:

  • 225 g caster sugar
  • 100 g chilled butter (cubed)
  • 100ml double cream
  • 1 heaped teaspoon of sea salt flakes

For the chocolate layer:

  • 100g caster sugar
  • 2 eggs
  • 2 egg yolks
  • 250g dark chocolate
  • 150 g butter (cubed)

Method:

For the sweet shortcrust pastry:

1) Pulse the flour, butter and icing sugar in a food processor briefly until the butter is in small lumps. Add half the beaten egg and continue to whiz for another few seconds or until the mixture looks as though it may come together when pressed. Prolonged processing will only toughen the pastry, so don’t whiz it up until it is a ball of dough. You may need to add a little more egg, but not too much as the mixture should be just moist enough to come together.

If making by hand, rub the butter into the flour and icing sugar until it resembles coarse breadcrumb,s then using your hands add just enough egg to bring it together.

Reserve any leftover egg to use later.

2) With your hands, flatten out the ball of dough until it is about 2cm thick, then wrap in cling film or place in a plastic bag and chill in the fridge for at least 30 minutes.

3) After 30 minutes, butter a 23cm deep loose-bottomed, fluted tart tin and remove the pastry from the fridge. Roll it out to fit the tart tin, no thicker than 5mm. Rachel recommends putting it in between two sheets of clingflim but I’ve tried this and it makes rolling the pasty bloody difficult. I’d suggest just using enough flour on your surface and rolling pin to keep it from sticking.

4) Once your pastry is large and thin enough to fit your tart tin, roll it up round the rolling pin. Then unroll it over the tart tin, with the tin centrally beneath the pastry. Press the pastry into the edges of the tin (a good trick for doing this is to use a small ball of the pastry as a damper, rather than your fingers). Then using your thumb, ‘cut’ the pastry along the edge of the tin (press down onto the edge of the tin and the excess pastry falls away) for a neat finish. Prick the base all over with a fork and chill the pastry in the fridge for another 30 minutes or the freezer for 10 minutes.

5) Meanwhile, preheat the oven to 180C/fan 160C/gas 4. Remove the pastry from the fridge and line with foil, greaseproof paper or baking parchment, leaving plenty to come over the sides. Fill with baking beans or dried pulses, then place in the oven and bake blind for 15–20 minutes or until the base of the pastry case feels dry. Remove from the oven, take out the baking beans and foil/paper, brush the base of the pastry with any leftover beaten egg, and cook in the oven for another 3 minutes or until lightly golden. Remove from the oven and set aside:

tart 13

For the caramel:

6) Put the sugar and 75ml water into a heavy-based saucepan over a low heat and stir until the sugar dissolves. Add the butter and stir until it melts. Increase the heat to medium and allow to bubble away, stirring occasionally, for about 15 minutes or until the mixture is a light toffee colour. Mix in the cream and sea salt and boil for another 2–3 minutes until slightly thickened. Allow to cool. (NB this sounds straightforward. It is *not*. You need to stand over the molten sugar and butter, stirring and watching like a HAWK. The first time I did it it took me four gos to get it right. It burns and crystallises very, very quickly. Take it off the heat as soon as it is toffee coloured or it will burn and crystalise and you’ll have to start again).

For the chocolate layer:

7) Whisk the sugar, eggs and egg yolks until thickened and creamy in colour. Gently melt the chocolate and butter together in a bowl over a saucepan of simmering water. Leave to cool for a minute and then add this to the sugar and egg mixture and whisk until glossy:

tart 10tart 8

8) Spread the caramel over the cooled pastry base:

tart 11

9) Spoon over the chocolate mixture, spreading it evenly.

tart 5

10) Bake in the pre-heated oven for about 20 minutes or until it is almost set but still a bit wobbly. Allow to cool in the tin for 40–45 minutes before removing from the tin and serving in slices. Yum (and then some!)

tart1 tart fianl

[Some people like to put cream over their slices. I think that is inherently wrong as you don’t need it, but each to their own.]

tart with cream

me with tart

Moroccan lamb cutlets, crushed new potatoes, peas and mint, and some carrot, sweet potato and ginger soup

soup 2   cooked cutlets  

I ended up cooking (by which I mean creating something from scratch) twice today, by accident. I usually have something simple for lunch (an ITSU cup soup, some salad leaves with smoked salmon or goats cheese with chutney) but a dear friend came for lunch at the last minute, I had ‘nothing in’ and had to be creative. So I made carrot, sweet potato and ginger soup with what I had in the fridge. And it was really rather lovely, especially with the sourdough bread I found at the back of the freezer. So I think it’s worth sharing the recipe for. Then for dinner – I’d defrosted some lamb cutlets I’d had to freeze when an over enthusiastic butcher had chopped up the lamb rack I’d intended to cook covered in mustard and herbs for a dinner party (and was too British to complain about) and had been mooching about on the internet looking for something interesting to do with them, when I came across a fork and a pencil (v good food blog do have a look) and decided to make their golden Moroccan lamb cutlets because I was tired, there weren’t many ingredients or processes and they sounded yummy. And they were!  I added smashed new potatoes along with the peas and mint, and Mr AC says it was a thing of deliciousness and beauty and I am allowed to cook it again (along with plenty of other compliments about how lucky he is, what a splendid wife I am etc etc – it’s nearly father’s day, our anniversary and our birthday – 23 July yes both of us on the same day since you ask…..) So here we are with the recipe(s)..

Carrot, sweet potato and ginger soup (serves 6):

Ingredients:

  • Three medium sized sweet potatoes, peeled and chopped
  • 6 small/3 medium sized carrots, peeled and chopped
  • Two small/1 medium sized onions (you could use white/yellow or red), diced
  • One large clove of garlic, pressed/chopped/bashed
  • A thumb sized piece of ginger, peeled and finely chopped
  • One small or medium sized white potato, peeled and chopped (you could actually do without this if you don’t have one to hand)
  • 1 teaspoon of miso paste (use a gluten free brand if necessary. I use the Yutaka brand from Sainsbury’s which is gluten free)
  • 1 litre of vegetable stock
  • 1 or 2 tablespoons of single cream (optional; you could also just swirl yoghurt in before serving)
  • Salt and pepper

Method:

1) Sautee the onion in olive oil over a medium heat for 5 minutes.

2) Add the garlic and ginger and cook for 1 ish minute more.

3) Add the miso, stir and cook for another minute or two.

4) Add the carrot, sweet potato and white potato.

5) Stir and cook for another two minutes. Add salt and pepper.

6) Add the stock, bring to the boil and simmer for 15 minutes until the white potatoes and carrots are cooked through and soft.

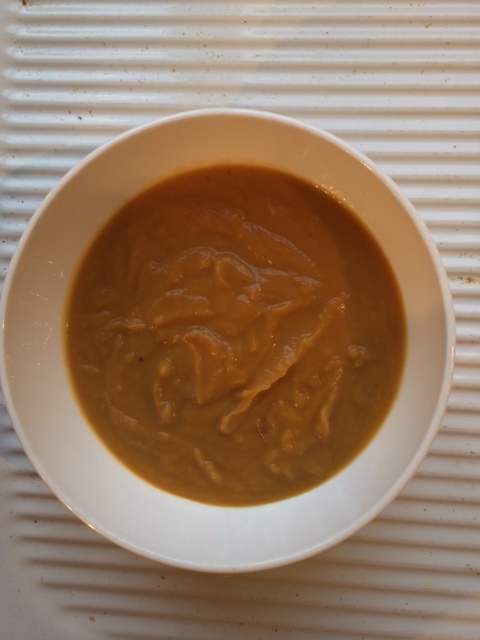
7) Use a hand blender to puree it to a smooth consistency. Add extra boiled water if too thick (add extra stock – perhaps a crumble of stock cube, which I did – if you’re going to end up with diluted flavour) and finally add the single cream, and serve, with sliced, warm sourdough, ciabatta or baguette and lots of butter. Yummmm.

Nice additions/alternatives:

  • Add some chopped red chilli when you add the ginger and some smooth peanut butter after blending, along with some cayenne pepper/chilli powder, coriander and chopped, salted peanuts for a bit of North African punch.
  • Replace the ginger with smoked sweet paprika, and add some fried bacon/lardons at the end to serve. Yummmmo!

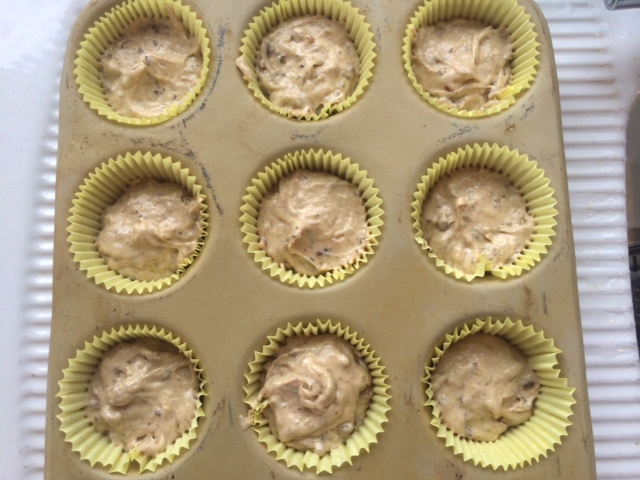
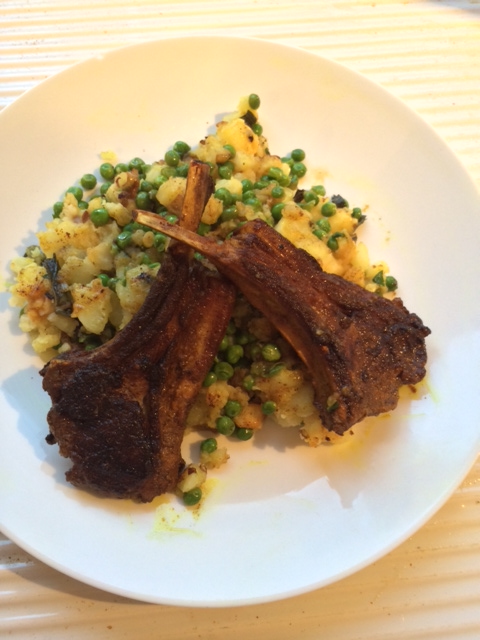
Golden lamb cutlets with smashed new potatoes, petit pois and mint (Serves one person with a normal appetite or two people being very polite on a first date (you’ll notice my photos only include two cutlets; I am not going on any first dates though)

Ingredients:

  • 4 lamb cutlets
  • 1 tablespoon of of ras el hanout (spice blend; available at most supermarkets)
  • 1 tablespoon of turmeric
  • 1/2 a teaspoon of sea salt flakes
  • 150g of new potatoes (baby or jersey royals all good)
  • 1 banana shallot, finely chopped
  • 250g of frozen petit pois
  • a handful of chopped fresh mint
  • some salted butter
  • Salt and pepper

Method:

1) Bash the lamb cutlets with a meat mallet or rolling pin (you can put a piece of cling film over them but I didn’t bother) to make them thinner.

2) Place the cutlets in a plastic sandwich bag, and add the ras el hanout, turmeric and salt. Close the bag and shake till the cutlets are covered in the spices.

fanned cutlets

3) Heat a tablespoon of olive oil in a large frying pan over a medium heat,  and cook the cutlets for 2-3 minutes each side (depending on how you like your lamb done), then transfer them to a sheet of tinfoil folded over to make them a little sealed but tented cocoon, and rest.

4) Meanwhile put the potatoes on to boil, with some fresh mint – 15-20 minutes until soft.

5) Sautee the chopped shallot in the same pan you cooked the lamb in, for about 3 minutes, until soft. Add the peas and cook for another 3 minutes until they are soft. Take off the heat and reserve.

5) Once the potatoes are cooked, run the cold tap over them and my advice would be to put on some of those latex gloves you can get in chemist shops and peel off the skins.. The gloves really do prevent you burning your fingers, taking the skin off the potatoes is essential, and NOBODY wants to peel new potatoes. And the gloves are cheap.

6) Add some salted butter to the new potatoes; add some chopped mint, crush them with a potato masher and mix together with the petit pois.

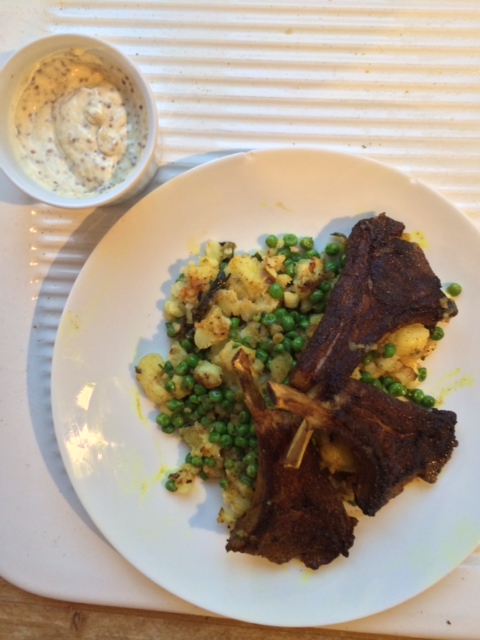
7) To serve, put some potato and pea mixture on a plate and arrange the cutlets attractively on top. Y U M!

(I served it with the juices from the cutlets while they’d been resting, and some mayonnaise mixed with wholegrain mustard, but Mr AC said he thought the mustard might overpower the flavours of the lamb and potatoes if you weren’t careful. So be careful).

cutlets with mayo

Korean style chicken noodle salad

photo 3 (1)

This is what I had for supper this evening, and is inspired by a salad I discovered recently in Pret a Manger and simply can’t get enough of. Many of my friends have fallen in love with the salad too so I promised to try and re-create it at home. This version actually comes quite close. The Pret salad works best eaten fridge cold, but this was very nice with the chicken still warm from the oven. Pret’s also has edamame beans (soy beans) in it. You could always add some peas or skinned broad beans (I just didn’t have any). The secret to achieving an authentic Korean flavour (alongside Kimchi, the fermented cabbage the Koreans eat with everything), is their national chilli paste, ‘Gochujang’. The only two places I know of that sell it are Tesco (larger stores only) and Souschef.co.uk. You can try and do without it and make an alternative using white miso, sugar, garlic, tomato ketchup, white balsamic vinegar and chilli sauce (like sriracha) but it won’t be quite the same. If you like Korean flavours and want to make Korean food at home it’s definitely worth investing in a tub. It will keep in the fridge for quite a while. And if you visit Souschef, chances are you’ll end up buying a few other things too – it’s a fabulous resource for difficult to find and interesting ingredients. And you do need the kimchi for this dish too.

Ingredients (serves 1):

For the marinade and dressing:

  • 4 tablespoons of toasted sesame oil
  • 2 tablespoons of rice vinegar
  • 2/3 heaped teaspoons of Korean chilli paste, Gochujang
  • Thumb sized piece of ginger, grated
  • 3 small cloves of garlic or 2 larger ones, crushed
  • 3 tablespoons of soy sauce (use a gluten free version like Kikkoman Gluten Free Soy Sauce) to make the dish gluten free)
  • 1 tablespoon of soft brown sugar
  • 2 tablespoons of runny honey
  • 1 chicken breast (or boneless thighs, which would also work well)

Mix marinade/dressing ingredients together. Taste, and add more chilli paste/honey/soy sauce/ginger/sugar if you think it needs it.  Reserve just over half as dressing and put the chicken breast into the rest and cover with clingfilm. Marinade the chicken for up to 24 hours, depending on how long before you want to eat you have the foresight to start the marinating process. I only marinated it for half an hour and it was still delicious.

For the salad:

  • 1 egg
  • 1 carrot
  • A quarter of a red cabbage
  • Chinese leaf (lettuce; Waitrose stock it)
  • Rice or soba noodles (I used soba as that was all I had in the cupboard this evening)
  • Two tablespoons of kimchi (also from Souchef.com)
  • White and black sesame seeds (Sainsbury’s stock them)

Method:

Pre-heat the oven to 180c (fan)

1) Using a ridged griddle pan, sear the chicken breast on both sides until it has nice dark stripes, then transfer to the oven for 10-15 minutes depending on the thickness of the breast.

image

2) Boil the egg for 6-7 minutes (you want it soft but not runny). Then run it under cold water, peel off the shell and slice into quarters.

3) Cook the noodles according to pack instructions (usually 5 minutes in boiling water).

4) Using a mandolin, finely slice the red cabbage.

5) Using a vegetable peeler, thinly slice the carrot.

6) Using a knife, finely slice the Chinese leaf lettuce.

7) Mix together the vegetables:

DSC_04701

8)  Pour half of the reserved dressing over the vegetables.

9) Add the drained and cooled noodles, the kimchi and the egg quarters.

10) Slice the chicken breast and place on top.

11) Pour over the remaining dressing and sprinkle on some white and black sesame seeds.

Yum!

photo 2 (2)

Gluten free ‘petticoat tail’ shortbread biscuits

final biscuit

My mother does not approve of shortbread. It is the fact that it is entirely comprised of butter, sugar and flour. She prefers her homemade biscuits to have oats, seeds and dried fruits in so as to offset their calorific burden with a nutritional bonus. But my children and I care little for that and find the particular synergy of fat and sugar in a shortbread biscuit a sheer and utter delight. And it works wonderfully well in a gluten free format so we make it a lot. Delilah has a ‘tribe’ fundraiser at school tomorrow. There is to be some biscuit decorating going on so I’ve made some petticoat tails to send in with her so she doesn’t miss out on the fun.

One thing my mother and I do agree on is the use of salted butter in baking. She never uses unsalted butter, reasoning that if you’re going to add a pinch of salt to the mixture anyway, why go to the bother of buying separate butter? I didn’t have any unsalted butter in tonight so I used salted and it works wonderfully well here, not least as you sprinkle them with delicious golden caster sugar anyway, and isn’t everything sweet ‘salted’ in some way these days? It really does enhance the flavour.

One word of warning, these biscuits will spread A LOT whilst baking so go with it when I say make the dough cake thick; it needs it or they melt away to nothing and you want a shortbread biscuit that you can sink your teeth into. It is a fabulous recipe though, the cornflour makes them wonderfully light, and gluten free or not they are a damn fine biscuit. In my humble opinion.

You could of course just make them into rounds (each to their own) but the kids and I find their triangular heart shapedness particularly pleasing.

Ingredients:

  • 230g gluten free flour
  • 110g cornflour
  • 110g icing sugar
  • 230g room temperature butter (salted or unsalted), cubed

Method:

Pre-heat your oven to 180c (fan)

1) Sieve the dry ingredients together into a large bowl

2) Rub in the chopped butter with your fingers

3) When all the butter is rubbed in, press it all together to make one big ball of dough:

shortbread dough

4) Wrap the ball in clingfilm and put it in the fridge for 20 minutes or so.

5) After 20 minutes roll out the dough on a lightly gluten free floured surface. Be careful, as it will crack so you need to be very gentle with it and shape and form it with care. You want to end up with a nice thick round cake shape, 2 cm high by 18 cm in diameter:

dough cake

6) Take a sharp knife and bisect the cake 4 times to demarcate 8 triangles. Then take a fork and with the tines facing down, gently impress the ends of the tines against the edges of the dough like so:

dough cake 2

I used the index finger of my other hand to press the edge of the dough in whilst pressing down with the fork as it is quite crumbly.

7) Then cut the triangles out and place them onto two baking trays lined with baking parchment (4 on each, with lots of space between so they don’t spread into each other):

triangles

8) Bake in the oven for 15-20 minutes.

9) Take out and after a couple of minutes transfer to a wire cooking rack and sprinkle them with golden caster sugar (or regular caster sugar if that’s what you have). They will be very crumbly whilst still hot, but once cooled they do firm up.

cooling cookies

They’re probably best eaten the next day/later in the afternoon once completely cooled and firm. Yum!