The Ultimate Flapjack

flapjack8

Delilah had another end of term music concert today and we’re always asked to make a contribution to the tea afterwards so I made some flapjacks as I didn’t have much time yesterday. I stupidly forgot to press start on the timer when I put the mixture into the oven so it got rather over-cooked and I thought it was a disaster; Mr Arabella Cooks pulled a face and said “the top is too crunchy”.  So I went along intending to put the plate of flapjack slices anonymously onto the catering table and pretend they weren’t mine. I was amazed and delighted therefore when people started asking who’d made them and could they have another one because they were delicious? I (obvs) quickly claimed them as mine and when a very sweet lady said they were the best flapjacks she’d ever tasted I promised to post the recipe. So here we are. The best flapjacks in the world (maybe; they’re also a bit Christmassy as they have cranberries in them).

Ingredients:

  • 400g oats (I used regular porridge oats)
  • 200g golden syrup
  • 200g light muscovado sugar
  • 200g unsalted butter
  • Grated zest of 1/2 a lemon
  • 3 tablespoons of dessicated coconut
  • 100g dried cranberries
  • 100g raisins
  • 80g white chocolate, melted
  • 80g dark chocolate, melted (or some of the chocolate sauce from my pumpkin pie recipe)

Method:

  1. Preheat the oven to 160 degrees (fan); grease and line a baking tin (I used a 7 inch square tin but I think it was a bit too small; either an 8 or 9 inch square or something rectangular would work well)
  2. Melt the butter, golden syrup and sugar together in a large saucepan.
  3. Take off the heat and stir in the oats, coconut, lemon zest, cranberries and raisins. Mix it all together well and make sure all the oats are coated with the melted butter and sugars.
  4. Pour into the prepared tin and pat it down (I started with a metal spoon but in the end just used my hands).
  5. Bake – you have two options here. If you like your flapjacks squidgy and soft, cook it for 25 minutes. If you like them crunchy, cook it for 40 minutes.
  6. When cooked, remove from the oven, allow to cool in the tin for 20 minutes then turn out onto a wire rack.
  7. Again you have two options here. You can either wait until the flapjack is completely cool and drizzle the white and dark chocolate (or chocolate sauce) over the top as per my picture above, and then cut it into squares, OR cut the flapjacks into squares before it cools completely (as it’s easier to cut then), push the squares together to form one big square, drizzle the chocolate over and then separate them while the chocolate cools and hardens. Dead yummy!


Gluten free white chocolate blondies with dark chocolate chunks

blondie

It’s late, I’m tired, I’ve been to Manchester and back to today and have only just finished working, but I promised someone I’d blog this very tasty blondie by tomorrow and at ten o’clock tomorrow morning I’m going to deepest, darkest Devon with no wifi or phone signal (the reality of this is just sinking in..) so it’s now or never. As you know the daughter has coeliac disease; she’s a very fussy eater; she likes chocolate (no fussiness with that foodstuff – what a shocker) and she’s also allergic to eggs. I’ve developed a blondie recipe that she can eat and actually doesn’t taste like it’s gluten AND egg free (it’s not crumbly and it has a decent rise) so here it is. (I made it with my new miracle egg replacer discovery – whipped chick pea brine, but I’ll give you directions for using the real thing too). It’s yum. When I left this morning the whole cake was intact as per the photo above; on my return this evening there were a few crumbs left. Mr Arabella Cooks and three lively children had demolished almost all of it (and I’ve just polished the rest off).

blondie 3_edited-1blondie 4

Ingredients:

  • 1 x 150g bar of gluten free white cooking chocolate (I use Green and Blacks) broken up.
  • 200g unsalted butter, cut up into small chunks
  • 150g of caster sugar
  • 1/2 a teaspoon of baking powder
  • 1/4 of a teaspoon of salt
  • 150g of gluten free plain flour (I use Doves)
  • 50g of gluten free BREAD flour (it has xanthan gum added to it which helps to bind your bake)
  • Half a bar of dark gluten free cooking chocolate (I use Green and Blacks)
  • 200 ml of milk (full fat)
  • 9 tablespoons of aquafaba (the liquid left when you drain a can of chickpeas), whipped to stiff peaks OR 3 large eggs

Method:

  1. Pre heat the oven to 180 (160 fan) degrees
  2. Grease and line a square 18cm/7 inch cake tin with baking parchment
  3. Melt the chocolate and the butter together in a large bowl over a small saucepan with a small amount of water in it, on a low heat. White chocolate (which isn’t really chocolate) does not react well to being heated too quickly or too much so watch it.
  4. Whisk your aquafaba to stiff peaks with a hand held or free standing mixer; if using eggs, whisk them to soft peaks then add the sugar and vanilla extract and beat until it looks like mousse.
  5. (With aquafaba): Mix the flours, sugar, salt and baking powder together in another bowl.
  6. Make a well in the centre and add the melted chocolate and butter mixture. Stir to combine.
  7. Fold in the whipped aquafaba using a metal spoon (you want to try and retain as much air as you can; it’s difficult as the aquafaba collapses more easily than real eggs).
  8. You want a nice ‘dropping consistency’ batter, so now add as much of the milk as you need to achieve this.
  9. Add the dark chocolate chips to the batter and stir. Add the batter to the prepared tin.
  10. Bake. In my oven it took 45-50 minutes to cook. All ovens vary so test it with a cake skewer at 25 minutes in and then every 5 minutes until it’s done. It’s OK for this to be a bit gooey in the middle – the best brownie/blondies are; it’s better for them to be under than over baked, but you don’t want too much floury taste left (esp as it’s gluten free flour) so make sure it’s got a good colour on the top and is done sufficiently.
  11. Remove from the oven; allow to cool in the tin then remove very gently and leave to cool completely on a wire rack.
  12. If you’re using real eggs to make this:
    1. You’ve melted the butter and white choc; you’ve whisked the eggs and added the sugar.
    2. Add the butter and choc to the eggs and keep whisking.
    3. Add the flours and baking powder directly to the egg and chocolate mixture and fold it in.
    4. You shouldn’t need to use the milk if you’re using eggs, but if your batter is too thick, add a little to loosen it
    5. Stir in the chopped up dark chocolate
    6. Spoon into the prepared tin and bake in the oven. I didn’t use eggs so couldn’t say for sure how long to cook it for but I’d say between 25 and 35 minutes; check it after 25 minutes as above..

Enjoy x

blondie 2

Chocolate cake in a cup

mug cake 1

I love making mug cakes. I love how easy they are – no weighing, melting or creaming, just measuring and adding spoonfuls into a cup. Last night Mr Arabella Cooks and I fancied a quick dessert after our evening roast so I knocked one of these up. We stood with our noses pressed against the microwave door oohing and ahhhing at the magic of the rapidly rising pud and it’s gorgeously thick, intensely chocolatey smell. When they work these are as good as any fancy restaurant or dinner party fondant.  Overcook them however and they are disgusting – like rubbery cardboard. Every microwave oven (bizarrely) cooks differently, so you might have to make a couple before you discover the exact time it takes to achieve mug cake perfection in your own oven. My first attempt last night didn’t work.  The recipe I used called for far too long in the oven. The second one, though, after a few tweaks, was utterly gorgeous.

They don’t photograph terribly well. The feature picture here is essentially just a mug. Sorry about that. But cooked perfectly they taste divine. So get a dozen or so eggs in, find someone to sample the ones that don’t work (our two year old is very handy in that regard) and enjoy the research.

Serves two (or 1 greedy person)

Equipment:

  • A mug
  • Some measuring spoons (these are a really useful thing to have in your kitchen; dessert spoons all differ in size so to be really accurate you need these)

Ingredients:

  • 4 tablespoons of plain flour
  • 4 tablespoons of sugar
  • 2 tablespoons of cocoa powder
  • 1 egg, lightly beaten
  • 3 tablespoons of milk
  • 3 tablespoons of vegetable oil or melted butter (I use oil)
  • 1/2 a teaspoon of vanilla essence
  • a  handful of dark chocolate pieces (I used Dr. Oetker dark chocolate chunks; chop up a small bar of chocolate if you don’t have any chips or chunks to hand)
  • Optional – a teaspoonful of peanut butter

Method

  1. Put the dry ingredients into the mug and stir with a fork
  2. Add the milk, oil or butter and vanilla. Stir to combine
  3. Add the egg and stir until you have a smooth, glossy batter with no pockets of flour
  4. Stir in the chocolate pieces and if you’re going to use it put the teaspoon of peanut butter into the middle of the batter and scrape in the peanut butter using another teaspoon
  5. Put the mug into the microwave. In mine, which is 900W, it takes exactly 1 minutes and 30 seconds to achieve fondant nirvana.
  6. Let it cool slightly, then either eat it straight from the mug or run a palette knife around the edge and tip it out gently onto two plates. There should be a natural break in the middle where it’s still gooey, giving you two perfect melting middle chocolate fondant puddings. It’s delicious with ice cream, especially my raspberry ripple. Yum!

Easy lemon curd mousse with lemon arlettes

mousse sharp

On tonight’s Bake Off the technical challenge was a biscuit called an Arlette which involves making a sort of puff pastry from scratch. Whilst on holiday in Devon two weeks ago I saw a Rose Prince dessert in a newspaper magazine which I thought sounded easy to make and tasty. I thereby unwittingly made these very same biscuits. (Well, sort of, anyway). I had no idea they were called Arlettes; I thought they were more of a Palmier (shows how much I know). Of course I didn’t make my own puff pastry and I suspect Paul and Mary would have issues with my thickness (and not having any cinnamon in them) but nevertheless they were delicious and went beautifully with the gorgeous lemon mousse, so, with a small amount of alteration, here they are. (Serves 4 – 6 depending on the size of your ramekins).

Ingredients for the lemon Arlettes:

  • 1 block or sheet of all butter puff pastry (blocks are usually 375g and sheets 320g)
  • The zest of 3 lemons, grated (Prince says 2 but I think they needed a bit more lemonyness)
  • 2 tbsp caster sugar
  • 1 egg, beaten

Method:

Preheat the oven to 200C

  1. Unroll your sheet of pastry, or roll out the pastry to ¼ cm thickness if you have a block. (Prince says ½ cm but I’m thinking about Paul and Mary here).
  2. Scatter 2/3 of the lemon zest and a generous tablespoon of sugar onto both sides of your pastry  – you can do this by putting half (of your two thirds) of the sugar and zest onto a piece of baking parchment, placing your pastry on that and then scattering the remaining half of your two thirds of lemon and zest on top of the pastry. (Sounds complicated; really isn’t).
  3. Roll up the pastry (from the short end) into a log shape, wrap it tightly in baking paper and chill in the fridge for at least 30 mins (or 10 mins in the freezer).
  4. Unwrap and cut the pastry roll into thin slices.
  5. Gently roll the slices even thinner using a rolling pin.
  6. Place the slices on a baking sheet covered with baking paper covered in half of the res of your zest and sugar.
  7. Brush them with beaten egg and then dust their tops with the remaining lemon zest and sugar.
  8. Bake until golden – about 10-15 minutes. Leave to cool on the baking sheet for a minute or two then cool completely on a rack.

Ingredients for the lemon curd mousse

  • 1 jar of the best lemon curd you can afford (about 320g. You could make your own, but then the recipe wouldn’t be ‘easy’)
  • 300g double cream, whipped
  • The zest of 1 lemon, pared (if you can. I find this very tricky. But it does look nicer if the peel is pared not grated. Though grated will of course be fine).

Method:

Fold the lemon curd into the whipped cream until the two are amalgamated, then spoon or pour it into pretty ramekins. Scatter the pared zest on the top and chill until needed. Serve with the beautiful Arlettes. Simple as. Yums! (ps your Arlettes should look thinner than mine!)

mousses 3

Father’s Day tea: Nana Christine’s cheese scones; strawberry and brown sugar pavlova

scones 7

I went out last night for the third evening in a row. As it was Father’s Day today I used the opportunity to make it up to my forbearing husband by making him some very nice things to eat. I did my best ever roast chicken for lunch (thyme butter in-between the breast meat and skin, and half a lemon in the cavity; duck fat roast potatoes) and in the afternoon we had high tea with grandparents: cheese scones and a brown sugar, chestnut and strawberry pavlova.

The Nana Christine in the title is my sister’s mother in law. She is an amazing baker and her cheese scones are delicious. The secret, she says, is not to roll out the dough with a rolling pin but simply flatten it using the heel of your hand. This helps the scones rise on their own and keeps them light. It definitely works – I’ve made them time and time again and they always turn out beautifully. They have a high proportion of cheese in the mix which I think is also key. I’m often disappointed by how un-cheesy a cheese scone can be. I also add a sprinkle of finely grated cheese on top of each scone. I think it looks appealing and makes them taste even better. My two year old was going to eat these so I didn’t add any cayenne pepper, but it’s customary to do so and makes them taste a little ‘tingly’, which I like, so I’m putting it into the recipe as an optional extra.

The pavlova is a Mary Cadogan recipe which I tweaked only very slightly.  It was absolutely divine and my best pavlova ever (I do say “This is my best ever”  rather often; “You say that every time you cook something” replies my husband; but this time, honestly, it was the truth). The brown sugar gives the meringue a gorgeous caramel flavour and the cornflour and vinegar give it a fabulously gooey middle. I am trying very hard not to go back to the fridge and polish off the whole lot.

Cheese scones Ingredients (makes 16):

  • 285g self raising flour
  • 85g butter (cold)
  • 230g mature cheddar, grated, plus a little extra for the top
  • 180ml milk
  • salt and pepper
  • Pinch of cayenne pepper (optional)

Method:

Preheat the oven to 180 C (fan)

  1. Mix the flour with the cayenne pepper if you’re going to use it (you can sift them together; you don’t need to sift if you’re not going to add the cayenne)
  2. Cut the butter into cubes and rub it into the flour with your fingertips until it resembles breadcrumbs
  3. Add a pinch of salt and a twist or two of black pepper
  4. Stir in the cheese with a metal fork, so that it’s completely coated with flour. You don’t want the cheese to melt so don’t use your hands.
  5. Add the milk slowly and mix into a stiff dough with a knife or fork. You may not need all the milk; you may find you need a teeny bit more. You need to use you judgement here –  you want a stiff, not gooey dough, but one that you can work with and won’t fall apart.
  6. Turn the dough out on to a floured surface and knead it lightly.
  7. Flatten out the dough with the heel of your hand, to about 3cm high. No lower or the scones won’t rise enough.
  8. Use a round cookie cutter (mine is 6cm diameter), cut out your scones and place on baking parchment on a metal baking tray. (When you have cut as many as you can, knead the remaining dough together again and repeat…)
  9. Glaze them with milk and sprinkle some grated cheese on top of each scone pavlova 5
  10. Bake in the oven for 20 minutes until they are a deep golden colour.
  11. Remove from the oven and cool on a wire rack, or just eat them immediately, with a large swipe of salted butter. Y U M!

          scones 8

Variation: To make fruit scones replace the cheese with 55g of sugar (golden caster is nice) and 55g sultanas (and obvs leave out the salt, pepper and cayenne too). Add the sugar and sultanas after you’ve rubbed in the butter; dip your cookie cutter in flour before cutting out each scone (to stop it sticking); don’t twist the cutter but bang your hand on the top and then pull it out cleanly; bake near them in a slightly hotter oven – 200C, for 10-15 minutes until golden. You could also use a mixture of milk and lightly beaten egg (about 100ml of milk and 2 medium eggs; reserve a little of the egg to glaze the top of the scones before baking).

Strawberry and brown sugar pavlova

pavlova 2

Ingredients:

For the pavlova

  • 2 tsp vinegar, any type but not malt. I used white wine vinegar.
  • 2 tsp vanilla extract
  • 2 heaped tsp cornflour
  • 4 large egg whites
  • 100g light muscovado/light brown sugar
  • 100g golden caster sugar
  • 25g whole (not blanched) hazelnuts bashed up a bit (I whizzed mine in my mini blender for a few seconds; you don’t want crumbs but slightly broken up is nice)

For the topping:

  • 600g strawberries
  • 3 tbsp cassis (blackcurrant liquer)
  • 3 tbsp pomegranate molasses
  • A tablespoon of icing sugar
  • 2 tablespoons of caster sugar
  • About 600ml of double cream
  • Some toasted flaked almonds (roughly 30g; buy flaked almonds and put them onto a baking sheet in the oven until you can smell them – about 5 mins or so, and they are slightly darkened)

Method:

For the pavlova

  1. Preheat the oven to 140C/fan 120C. Cut off a piece of baking parchment to fit your baking sheet; using a pencil draw round a 20cm cake tin onto the baking parchment; turn the parchment over (so you don’t get pencil on your pavlova).
  2. Add the vinegar and vanilla essence to the cornflour, gradually, to make a paste.
  3. Whisk the egg whites until stiff. I used a freestanding electric mixer but you can easily use a hand held electric whisk.
  4. Gradually whisk in the sugars, adding a little paste with each addition, until a thick marshmallowy meringue is formed. Don’t overwhisk your egg whites or the mixture will become grainy and you’ll knock all the air out. It will still taste great but won’t be quite as high (I actually over whisked mine a little, and it was still delicious, so don’t get too hung up about it).
  5. Spread it out in the circle on the baking sheet, swirling the knife (a palette knife is a good implement to use) to make peaks.
  6. Scatter over the hazelnuts
  7. Bake for 1 hour, then turn off the oven and leave it to cool. (I made mine the night before and left it in the oven overnight).

For the topping:

  1. Make a coulis by whizzing up 100g strawberries and a tablespoon of icing sugar with a hand blender, in the small bowl of a food processor or in a mini blender. Sieve the sauce into a bowl and add the cassis and pomegranate molasses.
  2. Whip the cream with the caster sugar, softly. (It is absolutely essential not to overwhip the cream). Top and slice half the strawberries and fold them into the cream.
  3. Swirl 3 tbsp of the coulis through the lightly whipped cream.
  4. Put the pavlova onto a large, flat plate. Spoon over the cream, scatter on the remaining strawberries (I left some whole, halved some with their tops still on and topped and halved the rest) and the toasted flaked almonds and drizzle with the sauce. Serve to some very lucky people indeed. Yummmmm!

pavlova 3

Banana and pecan cupcakes with dates, chocolate chips and cream cheese frosting

cupcakes 08     

My daughter played her violin in a concert at a lovely church this afternoon and we were asked to take along a contribution for the tea afterwards. I had a lot of over-ripe bananas in the freezer and was going to make a banana loaf, but cupcakes always go down well with the children (and parents actually) at these things so I decided to make banana cupcakes. The addition of the crème fraiche and the dates makes the cakes very moist and sweet (mmmm) so a perfect foil for this is a slightly tart cream cheese frosting. The frosting recipe I used turned out rather runny, but as luck would have it the very lovely and talented Ketta Shimmin of Flossi Pops Cakery was also at the concert and she told me the secret to perfect cream cheese frosting (see below). Chopped salted peanuts added a final salty kick and (shop-bought) chocolate stars made them look very pretty.  They were all devoured in minutes (and when asked, Mr AC said they were “very nice”).

Ingredients (makes approx. 16):

  • 250g self raising flour
  • 1 teaspoon of baking powder
  • 100g unsalted butter at room temperature
  • 150g caster sugar
  • 2 large eggs
  • 2 heaped tablespoons of greek yoghurt or crème fraiche (I used reduced fat)
  • 4 or 5 over-ripe bananas, mashed up
  • 1 teaspoon of vanilla extract
  • 1/4 of a teaspoon of salt
  • 1/2 a teaspoon of cinnamon
  • 70g chopped pecans
  • 4 or 5 dates (I used Mejdool) chopped up to the size of raisins, or smaller
  • 50g good quality dark chocolate chopped up quite small (or use chocolate chips)

banana cupake ingredients

Method:

Pre-heat the oven to 180c (160c fan). Line two cupcake tins with paper cases.

1) Using a hand-held electric whisk or free-standing mixer, cream together the butter and sugar on a medium speed until light and fluffy, about 3 minutes.

2) Add the eggs one at a time, mixing thoroughly after each addition

3) Add the crème fraiche/yoghurt, mashed bananas and vanilla and mix in well.

4) In a separate bowl, sift together the flour, baking powder, salt and cinnamon.

5) Mix the wet ingredients into the dry using a spoon or spatula.

6) Fold in the the pecans, chocolate and chopped up dates.

7) Divide the mixture evenly into paper cupcake cases – a mechanical ice cream scoop comes in handy for this if you have one.

cupcakes 3

8) Bake in the oven for 25 minutes or until the cakes are springy and a cake tester or skewer inserted into the middle of a cake comes out clean.

9) Remove from the oven and leave to cool in the tin for about 10 minutes, before removing and placing on a cooling rack.

cupcakes 4

For the frosting:

  • 200g butter
  • 200g cream cheese (fridge cold)
  • 450 icing sugar, sifted

Cream together the butter and sifted icing sugar (I have a freestanding mixer which makes this dead easy but a hand held electric whisk does the job just as well). Stir in the cream cheese straight from the fridge using a spatula or spoon; DON’T USE THE MIXER OR WHISK – that is what makes the icing go runny…Stir it well to ensure there are no lumps, then put the frosting into a piping bag with a large serrated nozzle and pipe onto the cooled cupcakes with a swirly flourish. (NB a stint in the fridge will also make a too runny frosting harden up a bit, if necessary).

Decorate as you wish – I used shop bought chocolate stars which the children loved and some chopped up salted peanuts for an extra flavour dimension. Yum!

cupcakes 9 cupcakes 8 cupcakes 06

Salted caramel chocolate tart

tart 2  tart on table

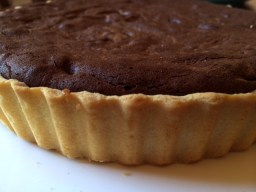
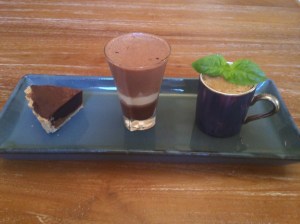
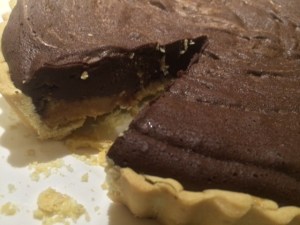
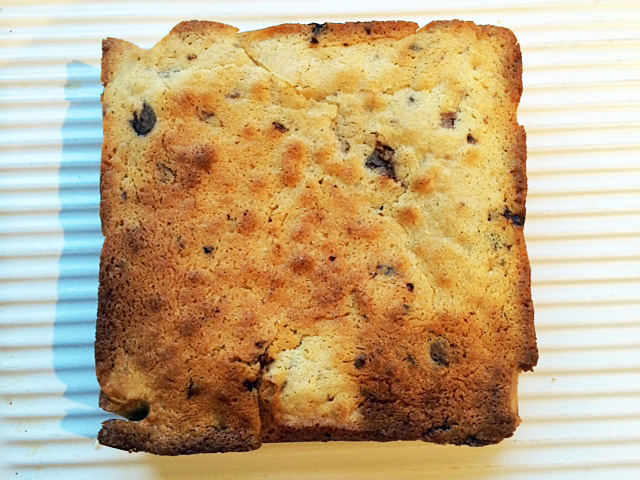
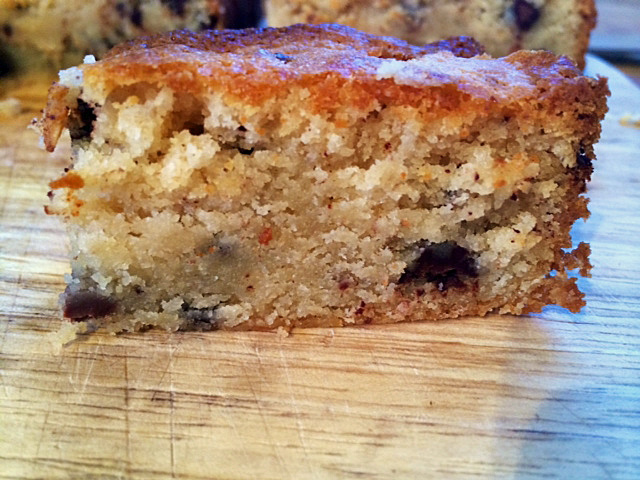
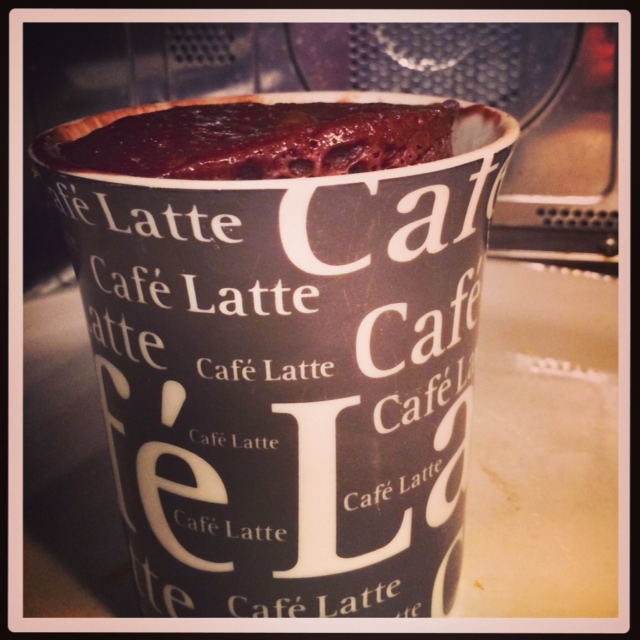
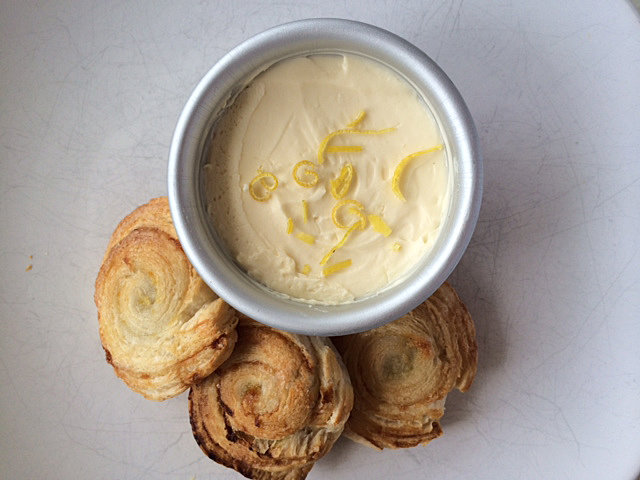
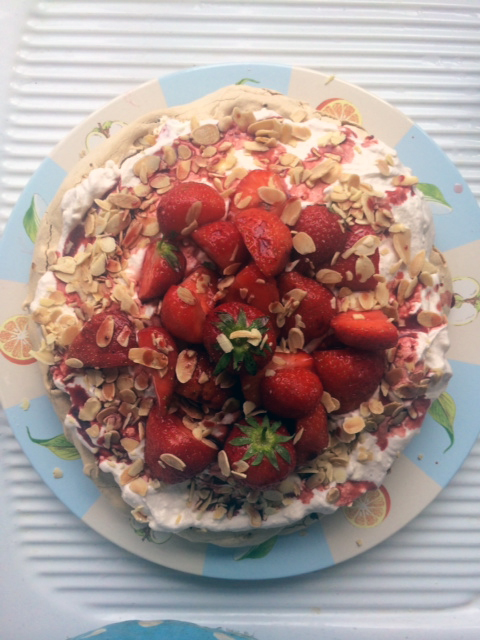
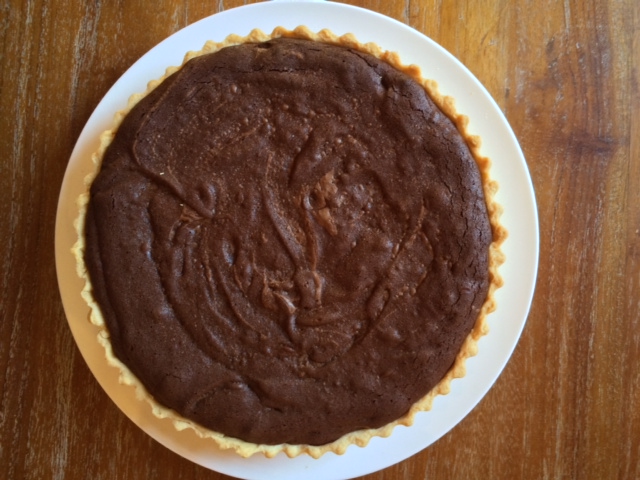
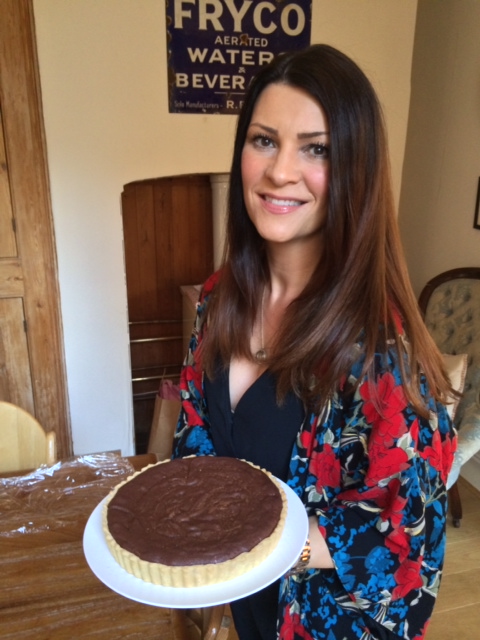
As promised, the salted caramel chocolate tart I made for last week’s party. It’s a recipe very dear to my heart as it got me onto Masterchef. I made a trio of chocolate puds for my filmed audition – salted caramel dark chocolate tart, milk chocolate mousse layered with mascarpone cream and a basil infused raspberry and white chocolate cheesecake (the cheesecake didn’t set so I served it upside down in an espresso cup):

qualifing dishes

I’ll post the recipe for all three at a later date, but in the meantime here is the salted caramel chocolate tart. The recipe comes from Rachel Allen (famous Irish TV cook; think blond, Irish Nigella) and is difficulty level ‘high’. But so, SO worth it. Hell it’s a Masterchef level dish so if you really want to impress anyone, this is definitely worth doing. (I’ve yet to come across anyone who didn’t swoon with delight upon eating it).
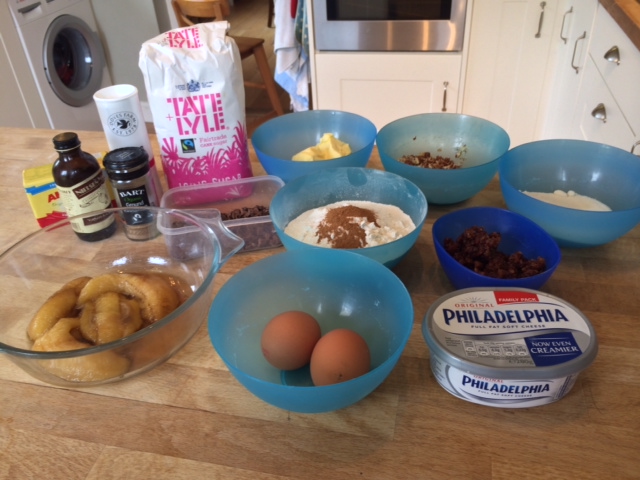
Ingredients:

For the sweet shortcrust pastry

  • 200g plain flour
  • 100g chilled butter (cubed, plus extra for greasing)
  • 1 tablespoon of icing sugar
  • a lightly beaten (large) egg

For the caramel:

  • 225 g caster sugar
  • 100 g chilled butter (cubed)
  • 100ml double cream
  • 1 heaped teaspoon of sea salt flakes

For the chocolate layer:

  • 100g caster sugar
  • 2 eggs
  • 2 egg yolks
  • 250g dark chocolate
  • 150 g butter (cubed)

Method:

For the sweet shortcrust pastry:

1) Pulse the flour, butter and icing sugar in a food processor briefly until the butter is in small lumps. Add half the beaten egg and continue to whiz for another few seconds or until the mixture looks as though it may come together when pressed. Prolonged processing will only toughen the pastry, so don’t whiz it up until it is a ball of dough. You may need to add a little more egg, but not too much as the mixture should be just moist enough to come together.

If making by hand, rub the butter into the flour and icing sugar until it resembles coarse breadcrumb,s then using your hands add just enough egg to bring it together.

Reserve any leftover egg to use later.

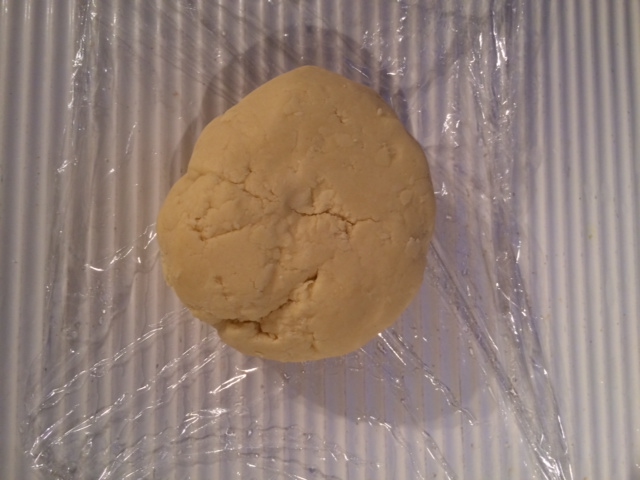
2) With your hands, flatten out the ball of dough until it is about 2cm thick, then wrap in cling film or place in a plastic bag and chill in the fridge for at least 30 minutes.

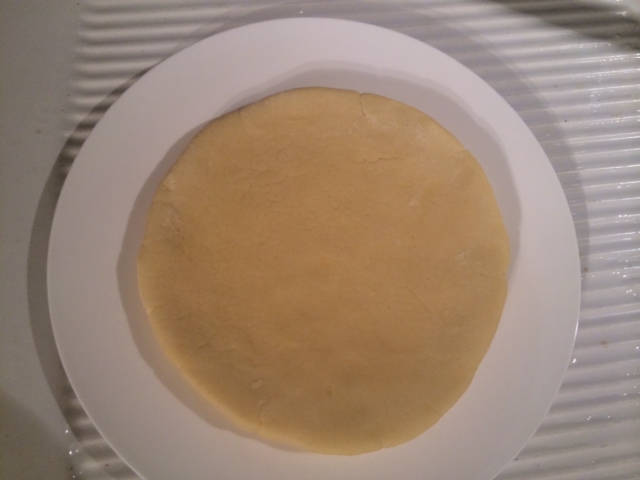
3) After 30 minutes, butter a 23cm deep loose-bottomed, fluted tart tin and remove the pastry from the fridge. Roll it out to fit the tart tin, no thicker than 5mm. Rachel recommends putting it in between two sheets of clingflim but I’ve tried this and it makes rolling the pasty bloody difficult. I’d suggest just using enough flour on your surface and rolling pin to keep it from sticking.

4) Once your pastry is large and thin enough to fit your tart tin, roll it up round the rolling pin. Then unroll it over the tart tin, with the tin centrally beneath the pastry. Press the pastry into the edges of the tin (a good trick for doing this is to use a small ball of the pastry as a damper, rather than your fingers). Then using your thumb, ‘cut’ the pastry along the edge of the tin (press down onto the edge of the tin and the excess pastry falls away) for a neat finish. Prick the base all over with a fork and chill the pastry in the fridge for another 30 minutes or the freezer for 10 minutes.

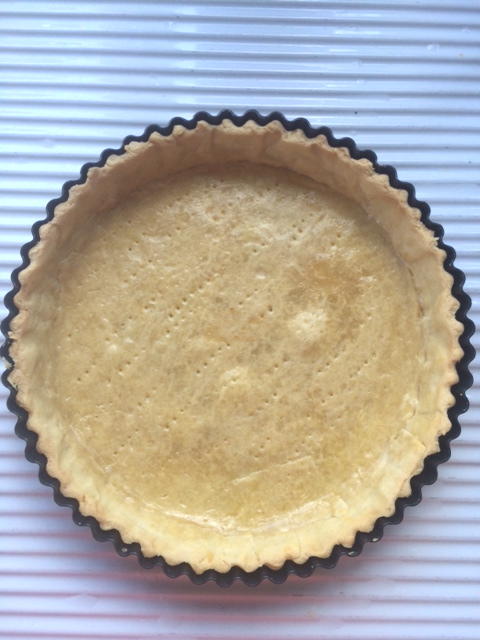
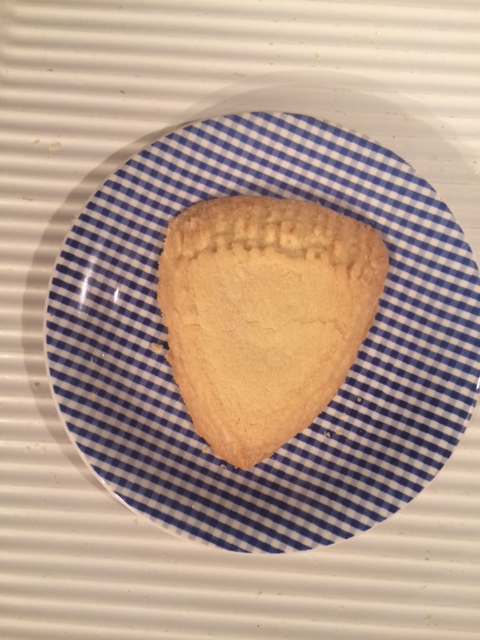
5) Meanwhile, preheat the oven to 180C/fan 160C/gas 4. Remove the pastry from the fridge and line with foil, greaseproof paper or baking parchment, leaving plenty to come over the sides. Fill with baking beans or dried pulses, then place in the oven and bake blind for 15–20 minutes or until the base of the pastry case feels dry. Remove from the oven, take out the baking beans and foil/paper, brush the base of the pastry with any leftover beaten egg, and cook in the oven for another 3 minutes or until lightly golden. Remove from the oven and set aside:

tart 13

For the caramel:

6) Put the sugar and 75ml water into a heavy-based saucepan over a low heat and stir until the sugar dissolves. Add the butter and stir until it melts. Increase the heat to medium and allow to bubble away, stirring occasionally, for about 15 minutes or until the mixture is a light toffee colour. Mix in the cream and sea salt and boil for another 2–3 minutes until slightly thickened. Allow to cool. (NB this sounds straightforward. It is *not*. You need to stand over the molten sugar and butter, stirring and watching like a HAWK. The first time I did it it took me four gos to get it right. It burns and crystallises very, very quickly. Take it off the heat as soon as it is toffee coloured or it will burn and crystalise and you’ll have to start again).

For the chocolate layer:

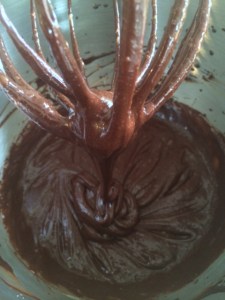
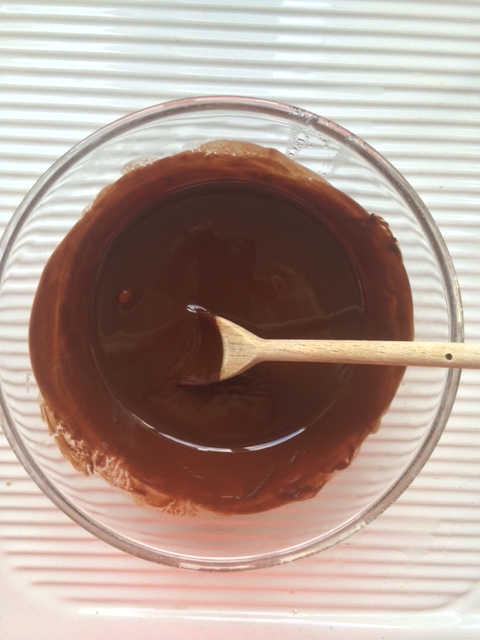
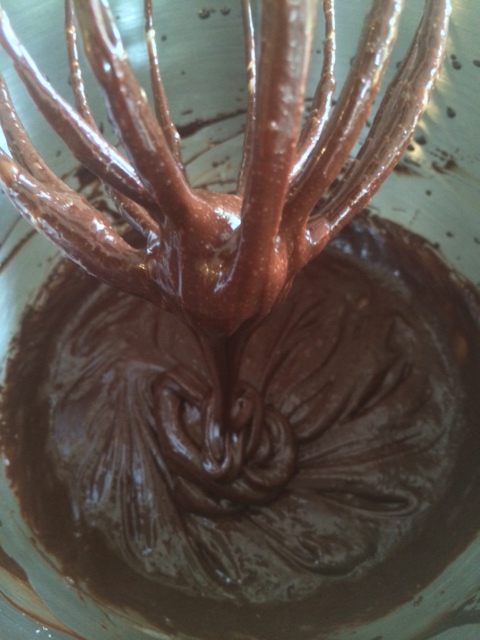
7) Whisk the sugar, eggs and egg yolks until thickened and creamy in colour. Gently melt the chocolate and butter together in a bowl over a saucepan of simmering water. Leave to cool for a minute and then add this to the sugar and egg mixture and whisk until glossy:

tart 10tart 8

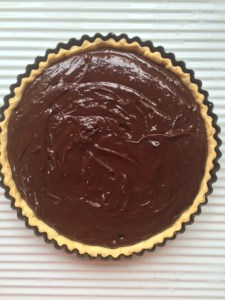
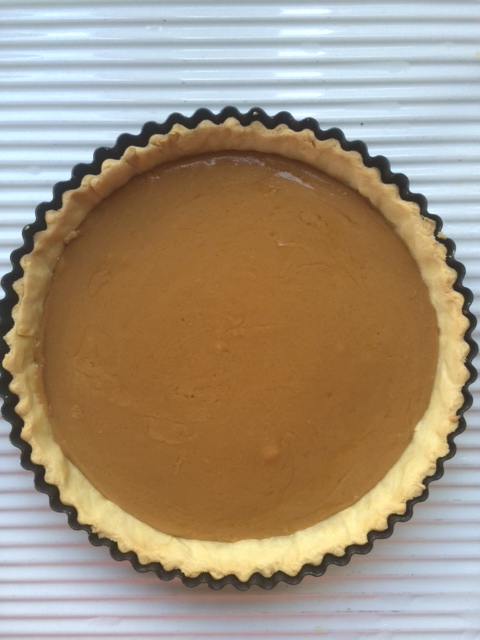
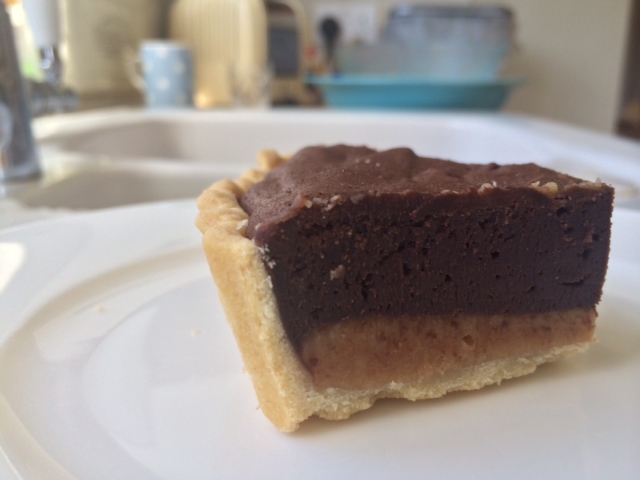
8) Spread the caramel over the cooled pastry base:

tart 11

9) Spoon over the chocolate mixture, spreading it evenly.

tart 5

10) Bake in the pre-heated oven for about 20 minutes or until it is almost set but still a bit wobbly. Allow to cool in the tin for 40–45 minutes before removing from the tin and serving in slices. Yum (and then some!)

tart1 tart fianl

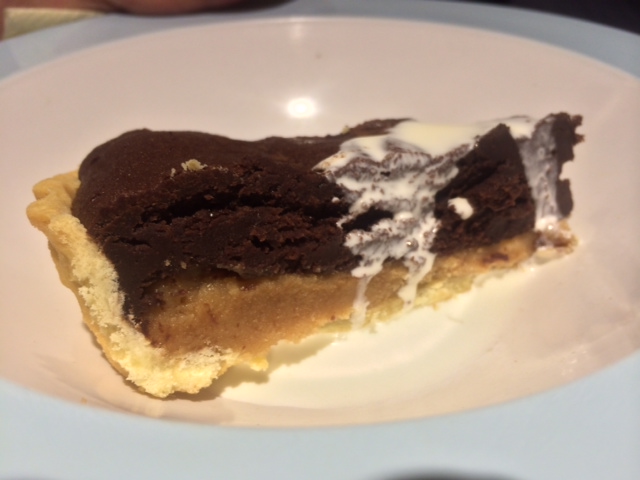
[Some people like to put cream over their slices. I think that is inherently wrong as you don’t need it, but each to their own.]

tart with cream

me with tart

Gluten free ‘petticoat tail’ shortbread biscuits

final biscuit

My mother does not approve of shortbread. It is the fact that it is entirely comprised of butter, sugar and flour. She prefers her homemade biscuits to have oats, seeds and dried fruits in so as to offset their calorific burden with a nutritional bonus. But my children and I care little for that and find the particular synergy of fat and sugar in a shortbread biscuit a sheer and utter delight. And it works wonderfully well in a gluten free format so we make it a lot. Delilah has a ‘tribe’ fundraiser at school tomorrow. There is to be some biscuit decorating going on so I’ve made some petticoat tails to send in with her so she doesn’t miss out on the fun.

One thing my mother and I do agree on is the use of salted butter in baking. She never uses unsalted butter, reasoning that if you’re going to add a pinch of salt to the mixture anyway, why go to the bother of buying separate butter? I didn’t have any unsalted butter in tonight so I used salted and it works wonderfully well here, not least as you sprinkle them with delicious golden caster sugar anyway, and isn’t everything sweet ‘salted’ in some way these days? It really does enhance the flavour.

One word of warning, these biscuits will spread A LOT whilst baking so go with it when I say make the dough cake thick; it needs it or they melt away to nothing and you want a shortbread biscuit that you can sink your teeth into. It is a fabulous recipe though, the cornflour makes them wonderfully light, and gluten free or not they are a damn fine biscuit. In my humble opinion.

You could of course just make them into rounds (each to their own) but the kids and I find their triangular heart shapedness particularly pleasing.

Ingredients:

  • 230g gluten free flour
  • 110g cornflour
  • 110g icing sugar
  • 230g room temperature butter (salted or unsalted), cubed

Method:

Pre-heat your oven to 180c (fan)

1) Sieve the dry ingredients together into a large bowl

2) Rub in the chopped butter with your fingers

3) When all the butter is rubbed in, press it all together to make one big ball of dough:

shortbread dough

4) Wrap the ball in clingfilm and put it in the fridge for 20 minutes or so.

5) After 20 minutes roll out the dough on a lightly gluten free floured surface. Be careful, as it will crack so you need to be very gentle with it and shape and form it with care. You want to end up with a nice thick round cake shape, 2 cm high by 18 cm in diameter:

dough cake

6) Take a sharp knife and bisect the cake 4 times to demarcate 8 triangles. Then take a fork and with the tines facing down, gently impress the ends of the tines against the edges of the dough like so:

dough cake 2

I used the index finger of my other hand to press the edge of the dough in whilst pressing down with the fork as it is quite crumbly.

7) Then cut the triangles out and place them onto two baking trays lined with baking parchment (4 on each, with lots of space between so they don’t spread into each other):

triangles

8) Bake in the oven for 15-20 minutes.

9) Take out and after a couple of minutes transfer to a wire cooking rack and sprinkle them with golden caster sugar (or regular caster sugar if that’s what you have). They will be very crumbly whilst still hot, but once cooled they do firm up.

cooling cookies

They’re probably best eaten the next day/later in the afternoon once completely cooled and firm. Yum!