Spiced Maple Cashew Bark

chocolat bark 2

This is an absolutely knock out edible chocolate gift. I’ve given a few away already this Christmas and everyone says it’s delicious. The recipe came from Olive Magazine; it looks and tastes impressive but it’s a doddle to make and the recipe is very flexible  – you can adapt it to suit any tastes or dietary requirements (I include a non nut version below for allergy sufferers..). Utterly yum!

Ingredients:

  • 100g unsalted cashew nuts
  • 25g unsalted butter
  • a generous pinch of ground allspice
  • a large pinch of sea salt flakes (actually you’ll need a few large pinches as you go along)
  • 1 tablespoon of maple syrup
  • 200g milk chocolate (I use Green and Blacks; don’t use Cadburys it doesn’t work in baking)
  • 200g dark chocolate (with high cocoa content; again I use G+B
  • 30g white chocolate (I use G+B again but any good supermarket cooking brand will do, just don’t use Nestle)

Method:

  1. Put the cashews and unsalted butter along with the allspice, salt and maple syrup into a non-stick frying pan over a medium heat.
  2. Cook until all the cashews are golden then tip out onto baking parchment, scatter over some more sea salt flakes and cool. (You’ll need to stir them from time to time, or do that cheffy pan flip thing to move them about. I like the pan flip thing).
  3. Melt the milk and dark chocolate separately in bain maries (ie glass bowls over pans of barely simmering water).
  4. Let the chocolates cool a little. Pour them out separately but making one large rectangle altogether, into a small baking tray lined with parchment.
  5. Mix them together carefully with a fork to make a nice swirly pattern. Leave to cool for a bit.
  6. Roughly chop the hardened cashews and scatter over the chocolate. Add some more salt (this may seem like a lot but you need to be able to taste it and it’s not too much of a sodium overload if you use sea salt flakes). Chill until set.
  7. Melt the white chocolate (in a bain marie) and drizzle over the top in very thin squiggly lines using a metal spoon. (Be careful with white chocolate; it has such a low/non existent cocoa content that if you let it get too hot it seizes really easily; keep it cool and keep an eye on it).
  8. Chill again until set then cut into shards. I put it into clear cellophane bags, tie with ribbon and label with a luggage tag to make it look fancy. [Store in the fridge as it softens very quickly].
  9. To make this suitable for nut allergy sufferers: substitute chopped up Crunchie bar or Green and Blacks butterscotch flavour chocolate for the cashews (I made some like this and used a combination of both, which was delicious).

The Ultimate Flapjack

flapjack8

Delilah had another end of term music concert today and we’re always asked to make a contribution to the tea afterwards so I made some flapjacks as I didn’t have much time yesterday. I stupidly forgot to press start on the timer when I put the mixture into the oven so it got rather over-cooked and I thought it was a disaster; Mr Arabella Cooks pulled a face and said “the top is too crunchy”.  So I went along intending to put the plate of flapjack slices anonymously onto the catering table and pretend they weren’t mine. I was amazed and delighted therefore when people started asking who’d made them and could they have another one because they were delicious? I (obvs) quickly claimed them as mine and when a very sweet lady said they were the best flapjacks she’d ever tasted I promised to post the recipe. So here we are. The best flapjacks in the world (maybe; they’re also a bit Christmassy as they have cranberries in them).

Ingredients:

  • 400g oats (I used regular porridge oats)
  • 200g golden syrup
  • 200g light muscovado sugar
  • 200g unsalted butter
  • Grated zest of 1/2 a lemon
  • 3 tablespoons of dessicated coconut
  • 100g dried cranberries
  • 100g raisins
  • 80g white chocolate, melted
  • 80g dark chocolate, melted (or some of the chocolate sauce from my pumpkin pie recipe)

Method:

  1. Preheat the oven to 160 degrees (fan); grease and line a baking tin (I used a 7 inch square tin but I think it was a bit too small; either an 8 or 9 inch square or something rectangular would work well)
  2. Melt the butter, golden syrup and sugar together in a large saucepan.
  3. Take off the heat and stir in the oats, coconut, lemon zest, cranberries and raisins. Mix it all together well and make sure all the oats are coated with the melted butter and sugars.
  4. Pour into the prepared tin and pat it down (I started with a metal spoon but in the end just used my hands).
  5. Bake – you have two options here. If you like your flapjacks squidgy and soft, cook it for 25 minutes. If you like them crunchy, cook it for 40 minutes.
  6. When cooked, remove from the oven, allow to cool in the tin for 20 minutes then turn out onto a wire rack.
  7. Again you have two options here. You can either wait until the flapjack is completely cool and drizzle the white and dark chocolate (or chocolate sauce) over the top as per my picture above, and then cut it into squares, OR cut the flapjacks into squares before it cools completely (as it’s easier to cut then), push the squares together to form one big square, drizzle the chocolate over and then separate them while the chocolate cools and hardens. Dead yummy!


Chocolate, Chai Spiced Pumpkin Pie with an Oreo cookie crust

pumpkin pie 4

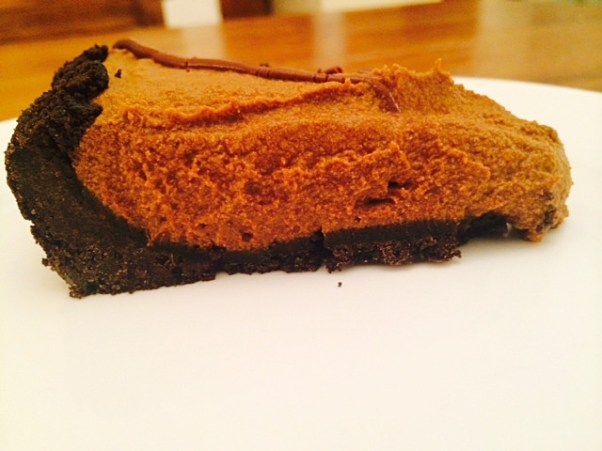
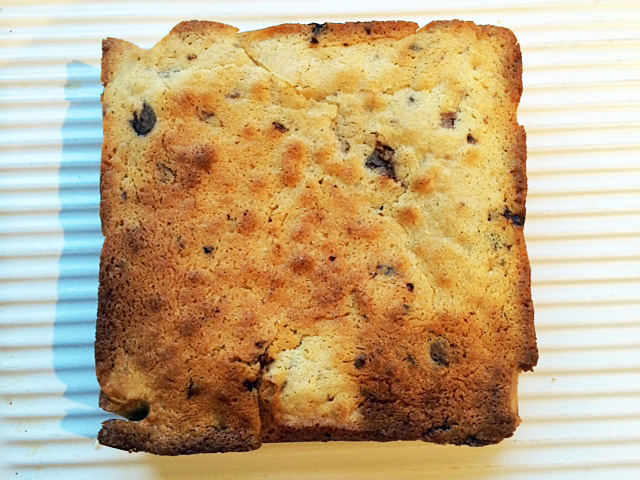
Yesterday was Thanksgiving and I went to my first ever Thanksgiving dinner party, cooked and hosted by a lovely American friend. Apparently Thanksgiving is bigger than Christmas in the States and they make as much effort with this meal as we do our Christmas food. Traditional Thanksgiving dinner consists of roast turkey, sprouts with bacon, creamed sweetcorn, mashed sweet potato with lots of cinnamon in it, cranberry sauce, carrots, stuffing and gravy. It’s similar to our Christmas meal but much, much sweeter.  For dessert they have pumpkin pie. More orange puree. I had volunteered to make the dessert for last night’s dinner but I just couldn’t face a traditional pumpkin pie because I can’t stand the taste of pumpkin, so I created this riff on the original. I added chocolate and salt to the crust and filling and chai spices to the filling. The Americans add ginger, cinnamon and cloves to their pie so chai was a good fit (although I did leave out the cardamom). I used Nigella Lawson’s salted Oreo crust (from her new book) instead of pastry because I wanted something with more depth and texture as a foil for the blandness of the pumpkin. And because I was using a biscuit crust I didn’t want to have to cook it, so it’s actually really easy to make and no baking involved.

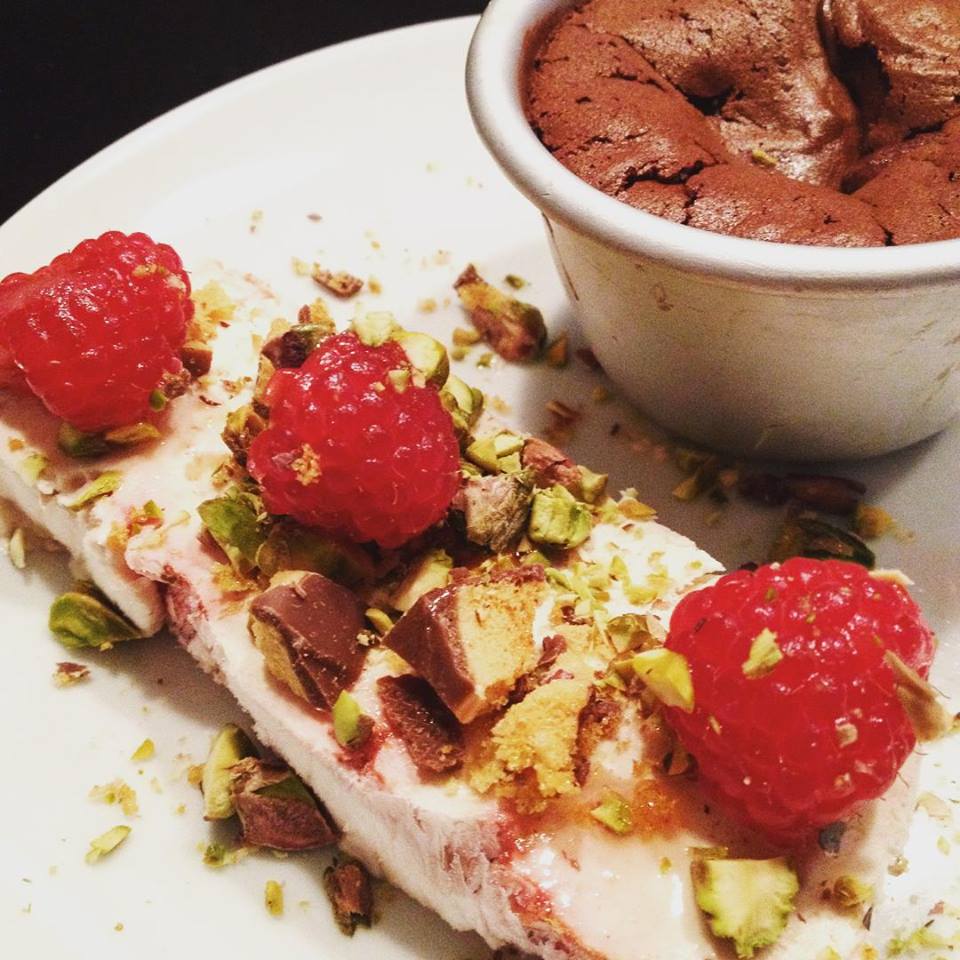
For maximum wow factor serve it, as I did, with the chocolate sauce (recipe below) and some caramel and chocolate chip ice cream (I’m posting the recipe for that in the near future, but in the meantime you could happily just soften some top quality vanilla ice cream, drizzle in some dulce de Leche or tinned Carnation Caramel and throw in some dark chocolate chopped up into very small pieces, run a fork through it to get a marbled effect from the caramel and freeze until ready to serve).

It was delicious and even my highly sceptical non pumpkin loving friend (not the American I hasten to add) said, in a very surprised voice “I like it!”

Ingredients

For the crust:

  • 2 packets of Oreo biscuits
  • 50g dark chocolate
  • 50g soft unsalted butter
  • 1/2 a teaspoon of smoked sea salt flakes (add them whole, not crumbled; you could happily use regular sea salt flakes, just don’t use table salt)

For the filling:

  • 1 can of Libby’s pumpkin puree (Waitrose stock it)
  • 100 grams dark chocolate  with min. 70% cocoa solids
  • 1 teaspoon of vanilla paste (I’ve recently discovered this. They all use it on Bake Off; you can just use vanilla extract but the paste has a deeper flavour)
  • 4 teaspoons of cocoa powder, sieved
  • 2 tablespoons of caramel (Dulce de Leche or Carnation is fine)
  •  70g dark brown muscovado sugar
  • 2 teaspoons of butter
  • ¾ teaspoon smoked (or regular) sea salt flakes
  • 3 teaspoons or 15g  cornflour
  •  40 ml full fat milk
  •  300 ml double cream
  • 1 chai teabag (I used Tea Pigs; their spices are whole so it was easy to take out the cardamom)
  • 1 sachet of  ‘Drink me chai’ Chai Latte powder

Method (for the crust):

  1. Break up the biscuits and put them into a food processor with the chocolate (also broken up) then blitz them together until you have crumbs.
  2. Add the butter and salt and blitz again until the mixture starts to clump together.
  3. Press the mixture into a large, round fluted tart tin and pat down on the bottom and up the sides of the tin with your hands and the back of a spoon (I used a bit of both), so that the base and sides are evenly lined and smooth. Put into the fridge to chill and harden for at least 1 hour (2 hours if your fridge is full).

For the filling:

  1. Melt the chocolate (broken up into small pieces) in a bain marie or in the microwave.
  2. In a food processor whizz together the pumpkin puree, muscovado sugar, caramel, butter, salt, cocoa powder and vanilla.
  3. Transfer the mixture to a large bowl and stir in the melted chocolate.
  4. Slake the cornflour – put it into into a cup and stir in the milk until smooth.
  5. Pour the cream into a heavy-based saucepan, open the chai teabag (take out the cardamom pod) and add the spices to the pan, along with 3 teaspoons of the Chai Latte powder. Heat the cream and spices gently for a few minutes.
  6. Add the cornflour and milk mixture to the cream and stir until the liquid is thick enough to coat the back of a spoon (if you run your finger down it, the two sides of the parting stay put).
  7. Take the thickened cream off the heat and sieve it directly into the pumpkin and chocolate mixture. Stir gently to combine. Taste it and add more Chai Latte or cocoa powder if desired.
  8. You want the mixture cool enough so it won’t melt the biscuit base when poured in so you could put a piece of damp baking parchment over the top of it to stop a skin forming and cool it down in the fridge if necessary. Otherwise just pour or spoon it into the set biscuit crust.
  9. Put pie into the fridge overnight to set.
  10. Take the pie out of the fridge about 5 minutes before you want to serve it – un-mould it by pushing the bottom up and out of the fluted ring (or stand it on something sturdy but smaller in circumference and gently push the fluted ring down and leave the base on).
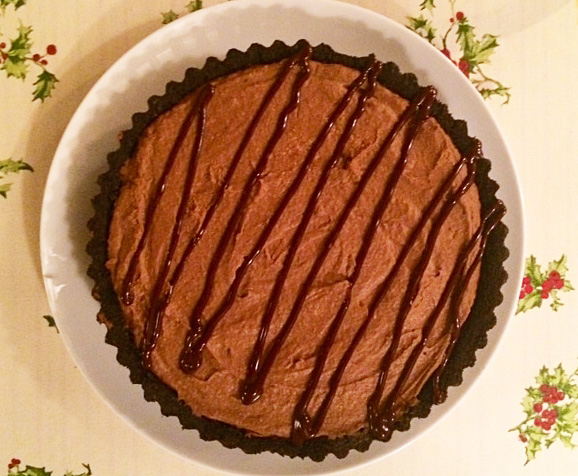
  11. You can serve it as is, or with a dusting of sieved icing sugar, or as I did, with a squiggle of chocolate sauce over the top and lots more chocolate sauce over the ice cream. To make the chocolate sauce, melt 100g plain chocolate with 50ml whipping cream, add a very generous squeeze of golden syrup, a tablespoon of condensed milk, a scant tablespoon of butter and a pinch of salt and stir together. Taste and add more syrup/condensed milk if desired. To achieve the perfect consistency for drizzling/squeezing over your pie you may need to add some milk to thin it – use your judgement.

As mentioned above, it goes exceedingly well with choc chip caramel ice cream too and makes for an utterly divine pud! Very yummy indeed.

slice of pie 1

Gluten free white chocolate blondies with dark chocolate chunks

blondie

It’s late, I’m tired, I’ve been to Manchester and back to today and have only just finished working, but I promised someone I’d blog this very tasty blondie by tomorrow and at ten o’clock tomorrow morning I’m going to deepest, darkest Devon with no wifi or phone signal (the reality of this is just sinking in..) so it’s now or never. As you know the daughter has coeliac disease; she’s a very fussy eater; she likes chocolate (no fussiness with that foodstuff – what a shocker) and she’s also allergic to eggs. I’ve developed a blondie recipe that she can eat and actually doesn’t taste like it’s gluten AND egg free (it’s not crumbly and it has a decent rise) so here it is. (I made it with my new miracle egg replacer discovery – whipped chick pea brine, but I’ll give you directions for using the real thing too). It’s yum. When I left this morning the whole cake was intact as per the photo above; on my return this evening there were a few crumbs left. Mr Arabella Cooks and three lively children had demolished almost all of it (and I’ve just polished the rest off).

blondie 3_edited-1blondie 4

Ingredients:

  • 1 x 150g bar of gluten free white cooking chocolate (I use Green and Blacks) broken up.
  • 200g unsalted butter, cut up into small chunks
  • 150g of caster sugar
  • 1/2 a teaspoon of baking powder
  • 1/4 of a teaspoon of salt
  • 150g of gluten free plain flour (I use Doves)
  • 50g of gluten free BREAD flour (it has xanthan gum added to it which helps to bind your bake)
  • Half a bar of dark gluten free cooking chocolate (I use Green and Blacks)
  • 200 ml of milk (full fat)
  • 9 tablespoons of aquafaba (the liquid left when you drain a can of chickpeas), whipped to stiff peaks OR 3 large eggs

Method:

  1. Pre heat the oven to 180 (160 fan) degrees
  2. Grease and line a square 18cm/7 inch cake tin with baking parchment
  3. Melt the chocolate and the butter together in a large bowl over a small saucepan with a small amount of water in it, on a low heat. White chocolate (which isn’t really chocolate) does not react well to being heated too quickly or too much so watch it.
  4. Whisk your aquafaba to stiff peaks with a hand held or free standing mixer; if using eggs, whisk them to soft peaks then add the sugar and vanilla extract and beat until it looks like mousse.
  5. (With aquafaba): Mix the flours, sugar, salt and baking powder together in another bowl.
  6. Make a well in the centre and add the melted chocolate and butter mixture. Stir to combine.
  7. Fold in the whipped aquafaba using a metal spoon (you want to try and retain as much air as you can; it’s difficult as the aquafaba collapses more easily than real eggs).
  8. You want a nice ‘dropping consistency’ batter, so now add as much of the milk as you need to achieve this.
  9. Add the dark chocolate chips to the batter and stir. Add the batter to the prepared tin.
  10. Bake. In my oven it took 45-50 minutes to cook. All ovens vary so test it with a cake skewer at 25 minutes in and then every 5 minutes until it’s done. It’s OK for this to be a bit gooey in the middle – the best brownie/blondies are; it’s better for them to be under than over baked, but you don’t want too much floury taste left (esp as it’s gluten free flour) so make sure it’s got a good colour on the top and is done sufficiently.
  11. Remove from the oven; allow to cool in the tin then remove very gently and leave to cool completely on a wire rack.
  12. If you’re using real eggs to make this:
    1. You’ve melted the butter and white choc; you’ve whisked the eggs and added the sugar.
    2. Add the butter and choc to the eggs and keep whisking.
    3. Add the flours and baking powder directly to the egg and chocolate mixture and fold it in.
    4. You shouldn’t need to use the milk if you’re using eggs, but if your batter is too thick, add a little to loosen it
    5. Stir in the chopped up dark chocolate
    6. Spoon into the prepared tin and bake in the oven. I didn’t use eggs so couldn’t say for sure how long to cook it for but I’d say between 25 and 35 minutes; check it after 25 minutes as above..

Enjoy x

blondie 2

Chocolate cake in a cup

mug cake 1

I love making mug cakes. I love how easy they are – no weighing, melting or creaming, just measuring and adding spoonfuls into a cup. Last night Mr Arabella Cooks and I fancied a quick dessert after our evening roast so I knocked one of these up. We stood with our noses pressed against the microwave door oohing and ahhhing at the magic of the rapidly rising pud and it’s gorgeously thick, intensely chocolatey smell. When they work these are as good as any fancy restaurant or dinner party fondant.  Overcook them however and they are disgusting – like rubbery cardboard. Every microwave oven (bizarrely) cooks differently, so you might have to make a couple before you discover the exact time it takes to achieve mug cake perfection in your own oven. My first attempt last night didn’t work.  The recipe I used called for far too long in the oven. The second one, though, after a few tweaks, was utterly gorgeous.

They don’t photograph terribly well. The feature picture here is essentially just a mug. Sorry about that. But cooked perfectly they taste divine. So get a dozen or so eggs in, find someone to sample the ones that don’t work (our two year old is very handy in that regard) and enjoy the research.

Serves two (or 1 greedy person)

Equipment:

  • A mug
  • Some measuring spoons (these are a really useful thing to have in your kitchen; dessert spoons all differ in size so to be really accurate you need these)

Ingredients:

  • 4 tablespoons of plain flour
  • 4 tablespoons of sugar
  • 2 tablespoons of cocoa powder
  • 1 egg, lightly beaten
  • 3 tablespoons of milk
  • 3 tablespoons of vegetable oil or melted butter (I use oil)
  • 1/2 a teaspoon of vanilla essence
  • a  handful of dark chocolate pieces (I used Dr. Oetker dark chocolate chunks; chop up a small bar of chocolate if you don’t have any chips or chunks to hand)
  • Optional – a teaspoonful of peanut butter

Method

  1. Put the dry ingredients into the mug and stir with a fork
  2. Add the milk, oil or butter and vanilla. Stir to combine
  3. Add the egg and stir until you have a smooth, glossy batter with no pockets of flour
  4. Stir in the chocolate pieces and if you’re going to use it put the teaspoon of peanut butter into the middle of the batter and scrape in the peanut butter using another teaspoon
  5. Put the mug into the microwave. In mine, which is 900W, it takes exactly 1 minutes and 30 seconds to achieve fondant nirvana.
  6. Let it cool slightly, then either eat it straight from the mug or run a palette knife around the edge and tip it out gently onto two plates. There should be a natural break in the middle where it’s still gooey, giving you two perfect melting middle chocolate fondant puddings. It’s delicious with ice cream, especially my raspberry ripple. Yum!

Hot chocolate mousse and raspberry ripple ice cream

hot choc mousse fiddled twice

It’s dessert week on Bake Off tonight and in honour of that I’m posting my hot chocolate mousse recipe. And because it’s so utterly delicious it will knock your socks off. And because it’s really REALLY easy to make.

Ingredients for chocolate mousse (serves 4):

  • 125g plain cooking chocolate
  • 35g unsalted butter (softened)
  • 3 eggs (separated)
  • 40g caster sugar

Method:

Pre-heat the oven to 180 c (fan).

  1. Break chocolate up into small pieces and put into a mixing bowl with the butter and melt over the pan of barely simmering water.
  2. Remove from the heat, add the egg yolks and stir well.
  3. Whisk the egg whites until they form stiff peaks, then gradually whisk in the sugar until glossy and stiff (like a meringue).
  4. Fold the meringue gently into the chocolate mixture and pour into oven-proof tea cups or ramekins. Chill in the fridge until time to cook (at least 20 minutes).
  5. When ready take the mousses out of the fridge and place them on a baking tray. Bake them at 180c for 8 minutes until the mousse has risen to the brim of the moulds and is beginning to firm up on the sides but still gooey in the middle. Serve immediately before they collapse.

Ingredients for raspberry ripple ice cream:

  • 200g raspberries
  • 3 tablespoons of icing sugar
  • 1 tablespoon of lemon juice
  • Ice cream in an ice cream maker:
    • 200g double cream
    • 200g full cream milk
    • 150g caster sugar
    • Pinch salt
  • Ice cream without an ice cream maker:
    • 600ml double cream
    • Half a 397ml can of condensed milk
    • 1 tsp vanilla essence

Method:

  1. Make the coulis – put the raspberries, icing sugar and lemon juice into a blender and whizz to a smooth sauce consistency. Pass through a sieve to remove the pips.
  2. Make the ice cream:
    1. In an ice cream maker: mix together the milk, cream, salt and sugar in a jug. Pour into a cooled down ice cream maker bowl and churn for 30 minutes or until thick.
    2. Without an ice cream maker: whisk the 600ml of double cream, tsp of vanilla and condensed milk until it’s very stiff. Line a loaf tin with cling film.
    3. For both methods once cream is churned/thick:  In either your loaf tin or a shallow plastic tub, add a layer of the cream, add a layer of the coulis, add another layer of cream and another layer of coulis, then a final layer of cream and the rest of the coulis on top. Use a knife or metal pronged stick to ripple the coulis around and through the cream, leaving a lovely swirly pattern on the top (this photo is of some blackcurrant ripple I made recently but you get the idea).

rippled ice cream

Serve the mousses straight away with a scoop or slice of raspberry ripple, which is nice with some chopped pistachios and honeycomb on top (you can make your own or just chop up a Crunchie bar if you can’t be bothered). I made this in the second round of Masterchef for the past winners (without the pistachios and honeycomb) and they and Greg all declared it yum!

hot chocolate mousse with rasp ripple iced cream

(Wonderful photo by Blanche Hughes, who has many more brilliant photos and recipes on her blog: Blanched. Check it out. x)

Gluten free mocha chocolate ice box cake

cake 3

A friend of mine is poorly so I made her a cake. This is a spectacularly easy way of making an impressive and delicious gluten free dessert, but it can be gluten free or gluten containing in the blink of an eye. It just depends what kind of biscuits you use. It’s based on the principle of an Italian tiramisu – flavoured whipped cream layered with biscuits. You put it in the fridge overnight and it hardens the cream and softens the biscuits (into ‘sponge’) et voila: cake/pudding/breakfast/whatever. Top it with something delicious and yum to the max, frankly.

Ingredients:

  • 4 packets of Maryland double choc chip cookies (if you don’t need to go down the gluten free route) or 5 packets of gluten free double chocolate chip biscuits (Kent of Fraser or Doves are good) to make it gluten free.
  • 600ml double cream
  • 100g caster sugar
  • 50/60ml of cold espresso coffee
  • 1 teaspoon of good vanilla essence
  • 350g mascarpone
  • 2 tablespoons of cocoa or cacao powder
  • Optional extra if not making for children: (60 mls Kahlua)

Method:

  1. In a large bowl, whisk together the cream, mascarpone, sugar, cocoa/cacao, cold espresso and vanilla (and Kahlua if using), until it forms firm peaks.
  2. Take a high sided, loose bottom cake tin (you don’t need it to be springform) and put a layer of biscuits on the bottom. You’ll need to break some to make the jigsaw of biscuits fit with as few gaps as possible (it takes practice; by the last layer I was brilliant at it).
  3. Spread a thin layer of the cream mixture over the biscuits. Put another layer of biscuits on top (again assembling it like a jigsaw) followed by another layer of cream and so on until you have run out of biscuits and cream/come to the top of the tin. You should end up with around 5 layers, with the top layer being cream.
  4. Cover with clingfilm and refrigerate overnight (or all day if making in the morning to serve at night. It needs at least 6 hours).
  5. When ready, take it out of the fridge and run a small sharp knife around the outside of the cake and push the bottom up and out (I used Mr AC to help me with this). On the top I put some caramel and Belgian chocolate popcorn (for texture and flavour) and then shaved some Lindt Swiss Classic Double Milk chocolate bar (which is my current favourite cake decorating secret) with a vegetable peeler on top of that. I should mention though that the Lindt chocolate is not gluten free (my friend didn’t need a gf option) so if you can’t have gluten use something else to decorate).
  6. Serve cold, in wedges.
  7. Store it in the fridge and eat quickly as it won’t keep for very long (no matter though as you’ll want to eat it all immediately anyway because it’s Y U M!).

cake 4   cake 5