Spiced Maple Cashew Bark

chocolat bark 2

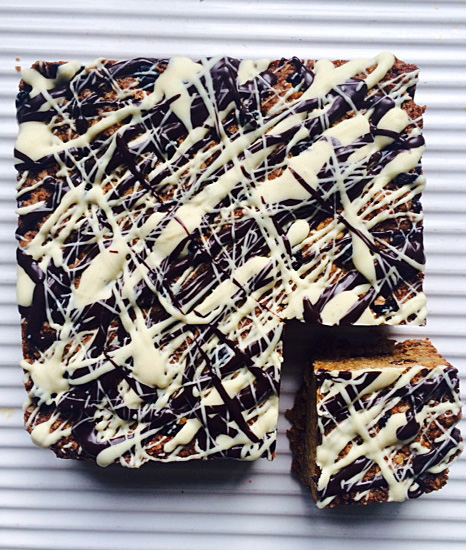
This is an absolutely knock out edible chocolate gift. I’ve given a few away already this Christmas and everyone says it’s delicious. The recipe came from Olive Magazine; it looks and tastes impressive but it’s a doddle to make and the recipe is very flexible  – you can adapt it to suit any tastes or dietary requirements (I include a non nut version below for allergy sufferers..). Utterly yum!

Ingredients:

  • 100g unsalted cashew nuts
  • 25g unsalted butter
  • a generous pinch of ground allspice
  • a large pinch of sea salt flakes (actually you’ll need a few large pinches as you go along)
  • 1 tablespoon of maple syrup
  • 200g milk chocolate (I use Green and Blacks; don’t use Cadburys it doesn’t work in baking)
  • 200g dark chocolate (with high cocoa content; again I use G+B
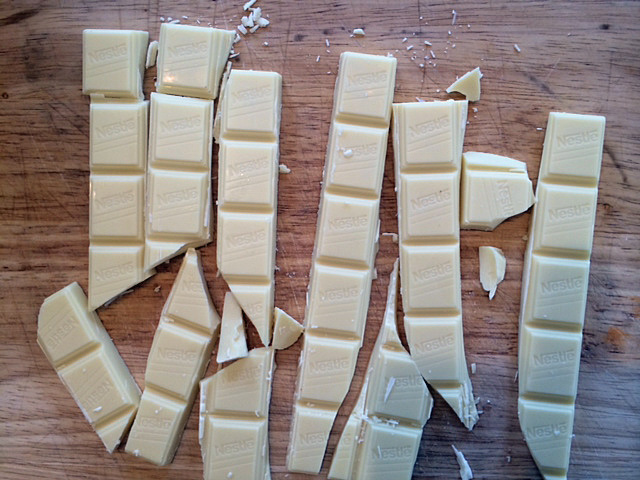
  • 30g white chocolate (I use G+B again but any good supermarket cooking brand will do, just don’t use Nestle)

Method:

  1. Put the cashews and unsalted butter along with the allspice, salt and maple syrup into a non-stick frying pan over a medium heat.
  2. Cook until all the cashews are golden then tip out onto baking parchment, scatter over some more sea salt flakes and cool. (You’ll need to stir them from time to time, or do that cheffy pan flip thing to move them about. I like the pan flip thing).
  3. Melt the milk and dark chocolate separately in bain maries (ie glass bowls over pans of barely simmering water).
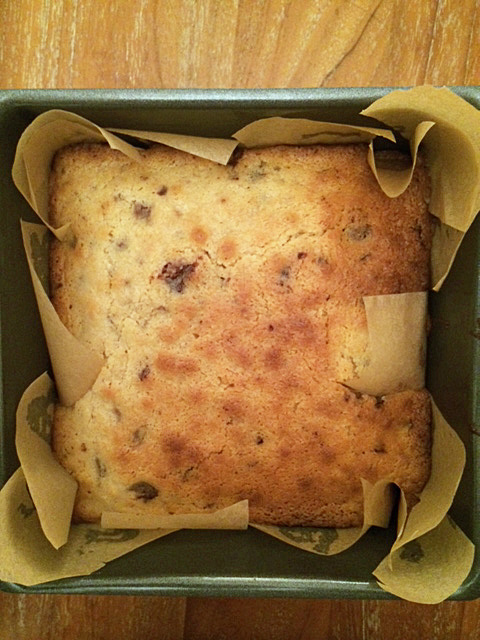
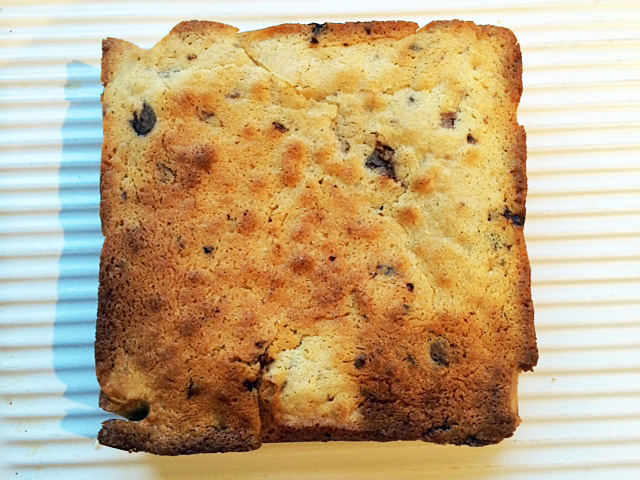
  4. Let the chocolates cool a little. Pour them out separately but making one large rectangle altogether, into a small baking tray lined with parchment.
  5. Mix them together carefully with a fork to make a nice swirly pattern. Leave to cool for a bit.
  6. Roughly chop the hardened cashews and scatter over the chocolate. Add some more salt (this may seem like a lot but you need to be able to taste it and it’s not too much of a sodium overload if you use sea salt flakes). Chill until set.
  7. Melt the white chocolate (in a bain marie) and drizzle over the top in very thin squiggly lines using a metal spoon. (Be careful with white chocolate; it has such a low/non existent cocoa content that if you let it get too hot it seizes really easily; keep it cool and keep an eye on it).
  8. Chill again until set then cut into shards. I put it into clear cellophane bags, tie with ribbon and label with a luggage tag to make it look fancy. [Store in the fridge as it softens very quickly].
  9. To make this suitable for nut allergy sufferers: substitute chopped up Crunchie bar or Green and Blacks butterscotch flavour chocolate for the cashews (I made some like this and used a combination of both, which was delicious).

The Ultimate Flapjack

flapjack8

Delilah had another end of term music concert today and we’re always asked to make a contribution to the tea afterwards so I made some flapjacks as I didn’t have much time yesterday. I stupidly forgot to press start on the timer when I put the mixture into the oven so it got rather over-cooked and I thought it was a disaster; Mr Arabella Cooks pulled a face and said “the top is too crunchy”.  So I went along intending to put the plate of flapjack slices anonymously onto the catering table and pretend they weren’t mine. I was amazed and delighted therefore when people started asking who’d made them and could they have another one because they were delicious? I (obvs) quickly claimed them as mine and when a very sweet lady said they were the best flapjacks she’d ever tasted I promised to post the recipe. So here we are. The best flapjacks in the world (maybe; they’re also a bit Christmassy as they have cranberries in them).

Ingredients:

  • 400g oats (I used regular porridge oats)
  • 200g golden syrup
  • 200g light muscovado sugar
  • 200g unsalted butter
  • Grated zest of 1/2 a lemon
  • 3 tablespoons of dessicated coconut
  • 100g dried cranberries
  • 100g raisins
  • 80g white chocolate, melted
  • 80g dark chocolate, melted (or some of the chocolate sauce from my pumpkin pie recipe)

Method:

  1. Preheat the oven to 160 degrees (fan); grease and line a baking tin (I used a 7 inch square tin but I think it was a bit too small; either an 8 or 9 inch square or something rectangular would work well)
  2. Melt the butter, golden syrup and sugar together in a large saucepan.
  3. Take off the heat and stir in the oats, coconut, lemon zest, cranberries and raisins. Mix it all together well and make sure all the oats are coated with the melted butter and sugars.
  4. Pour into the prepared tin and pat it down (I started with a metal spoon but in the end just used my hands).
  5. Bake – you have two options here. If you like your flapjacks squidgy and soft, cook it for 25 minutes. If you like them crunchy, cook it for 40 minutes.
  6. When cooked, remove from the oven, allow to cool in the tin for 20 minutes then turn out onto a wire rack.
  7. Again you have two options here. You can either wait until the flapjack is completely cool and drizzle the white and dark chocolate (or chocolate sauce) over the top as per my picture above, and then cut it into squares, OR cut the flapjacks into squares before it cools completely (as it’s easier to cut then), push the squares together to form one big square, drizzle the chocolate over and then separate them while the chocolate cools and hardens. Dead yummy!


Gluten free white chocolate blondies with dark chocolate chunks

blondie

It’s late, I’m tired, I’ve been to Manchester and back to today and have only just finished working, but I promised someone I’d blog this very tasty blondie by tomorrow and at ten o’clock tomorrow morning I’m going to deepest, darkest Devon with no wifi or phone signal (the reality of this is just sinking in..) so it’s now or never. As you know the daughter has coeliac disease; she’s a very fussy eater; she likes chocolate (no fussiness with that foodstuff – what a shocker) and she’s also allergic to eggs. I’ve developed a blondie recipe that she can eat and actually doesn’t taste like it’s gluten AND egg free (it’s not crumbly and it has a decent rise) so here it is. (I made it with my new miracle egg replacer discovery – whipped chick pea brine, but I’ll give you directions for using the real thing too). It’s yum. When I left this morning the whole cake was intact as per the photo above; on my return this evening there were a few crumbs left. Mr Arabella Cooks and three lively children had demolished almost all of it (and I’ve just polished the rest off).

blondie 3_edited-1blondie 4

Ingredients:

  • 1 x 150g bar of gluten free white cooking chocolate (I use Green and Blacks) broken up.
  • 200g unsalted butter, cut up into small chunks
  • 150g of caster sugar
  • 1/2 a teaspoon of baking powder
  • 1/4 of a teaspoon of salt
  • 150g of gluten free plain flour (I use Doves)
  • 50g of gluten free BREAD flour (it has xanthan gum added to it which helps to bind your bake)
  • Half a bar of dark gluten free cooking chocolate (I use Green and Blacks)
  • 200 ml of milk (full fat)
  • 9 tablespoons of aquafaba (the liquid left when you drain a can of chickpeas), whipped to stiff peaks OR 3 large eggs

Method:

  1. Pre heat the oven to 180 (160 fan) degrees
  2. Grease and line a square 18cm/7 inch cake tin with baking parchment
  3. Melt the chocolate and the butter together in a large bowl over a small saucepan with a small amount of water in it, on a low heat. White chocolate (which isn’t really chocolate) does not react well to being heated too quickly or too much so watch it.
  4. Whisk your aquafaba to stiff peaks with a hand held or free standing mixer; if using eggs, whisk them to soft peaks then add the sugar and vanilla extract and beat until it looks like mousse.
  5. (With aquafaba): Mix the flours, sugar, salt and baking powder together in another bowl.
  6. Make a well in the centre and add the melted chocolate and butter mixture. Stir to combine.
  7. Fold in the whipped aquafaba using a metal spoon (you want to try and retain as much air as you can; it’s difficult as the aquafaba collapses more easily than real eggs).
  8. You want a nice ‘dropping consistency’ batter, so now add as much of the milk as you need to achieve this.
  9. Add the dark chocolate chips to the batter and stir. Add the batter to the prepared tin.
  10. Bake. In my oven it took 45-50 minutes to cook. All ovens vary so test it with a cake skewer at 25 minutes in and then every 5 minutes until it’s done. It’s OK for this to be a bit gooey in the middle – the best brownie/blondies are; it’s better for them to be under than over baked, but you don’t want too much floury taste left (esp as it’s gluten free flour) so make sure it’s got a good colour on the top and is done sufficiently.
  11. Remove from the oven; allow to cool in the tin then remove very gently and leave to cool completely on a wire rack.
  12. If you’re using real eggs to make this:
    1. You’ve melted the butter and white choc; you’ve whisked the eggs and added the sugar.
    2. Add the butter and choc to the eggs and keep whisking.
    3. Add the flours and baking powder directly to the egg and chocolate mixture and fold it in.
    4. You shouldn’t need to use the milk if you’re using eggs, but if your batter is too thick, add a little to loosen it
    5. Stir in the chopped up dark chocolate
    6. Spoon into the prepared tin and bake in the oven. I didn’t use eggs so couldn’t say for sure how long to cook it for but I’d say between 25 and 35 minutes; check it after 25 minutes as above..

Enjoy x

blondie 2