Vegan gluten free fairy cakes

vegan gf fairycakes

My daughter loves home made cakes.  As a coeliac who’s allergic to eggs (and very fussy) she has limited choices when it comes to cake so I’m  constantly trying to create the perfect baked good for her. I’ve been experimenting with all sorts of different types of flour recently in an effort to eliminate the claggy, chalky texture that you sometimes get in gluten free cakes and I’ve really fallen in love with Kinako, made from roasted soya beans and which tastes like caramel peanuts. I’ve used it here, but you can easily omit it (I give you that option) as it’s fairly hard to get hold of. I also often add ground almonds to a gluten free cakes as they also help with the texture. I’ve included them here but if you can’t eat nuts just  omit them and make up the weight in gf flour.

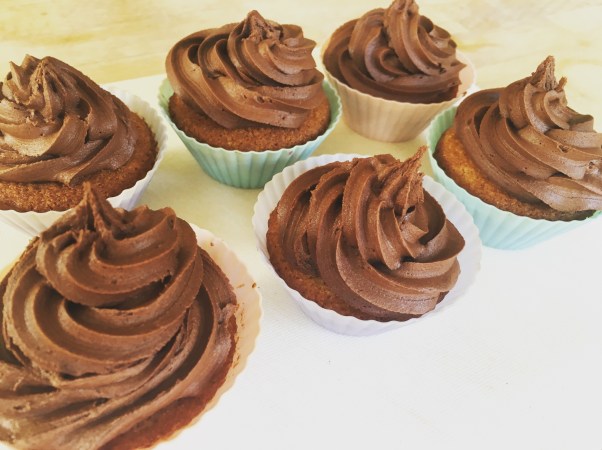
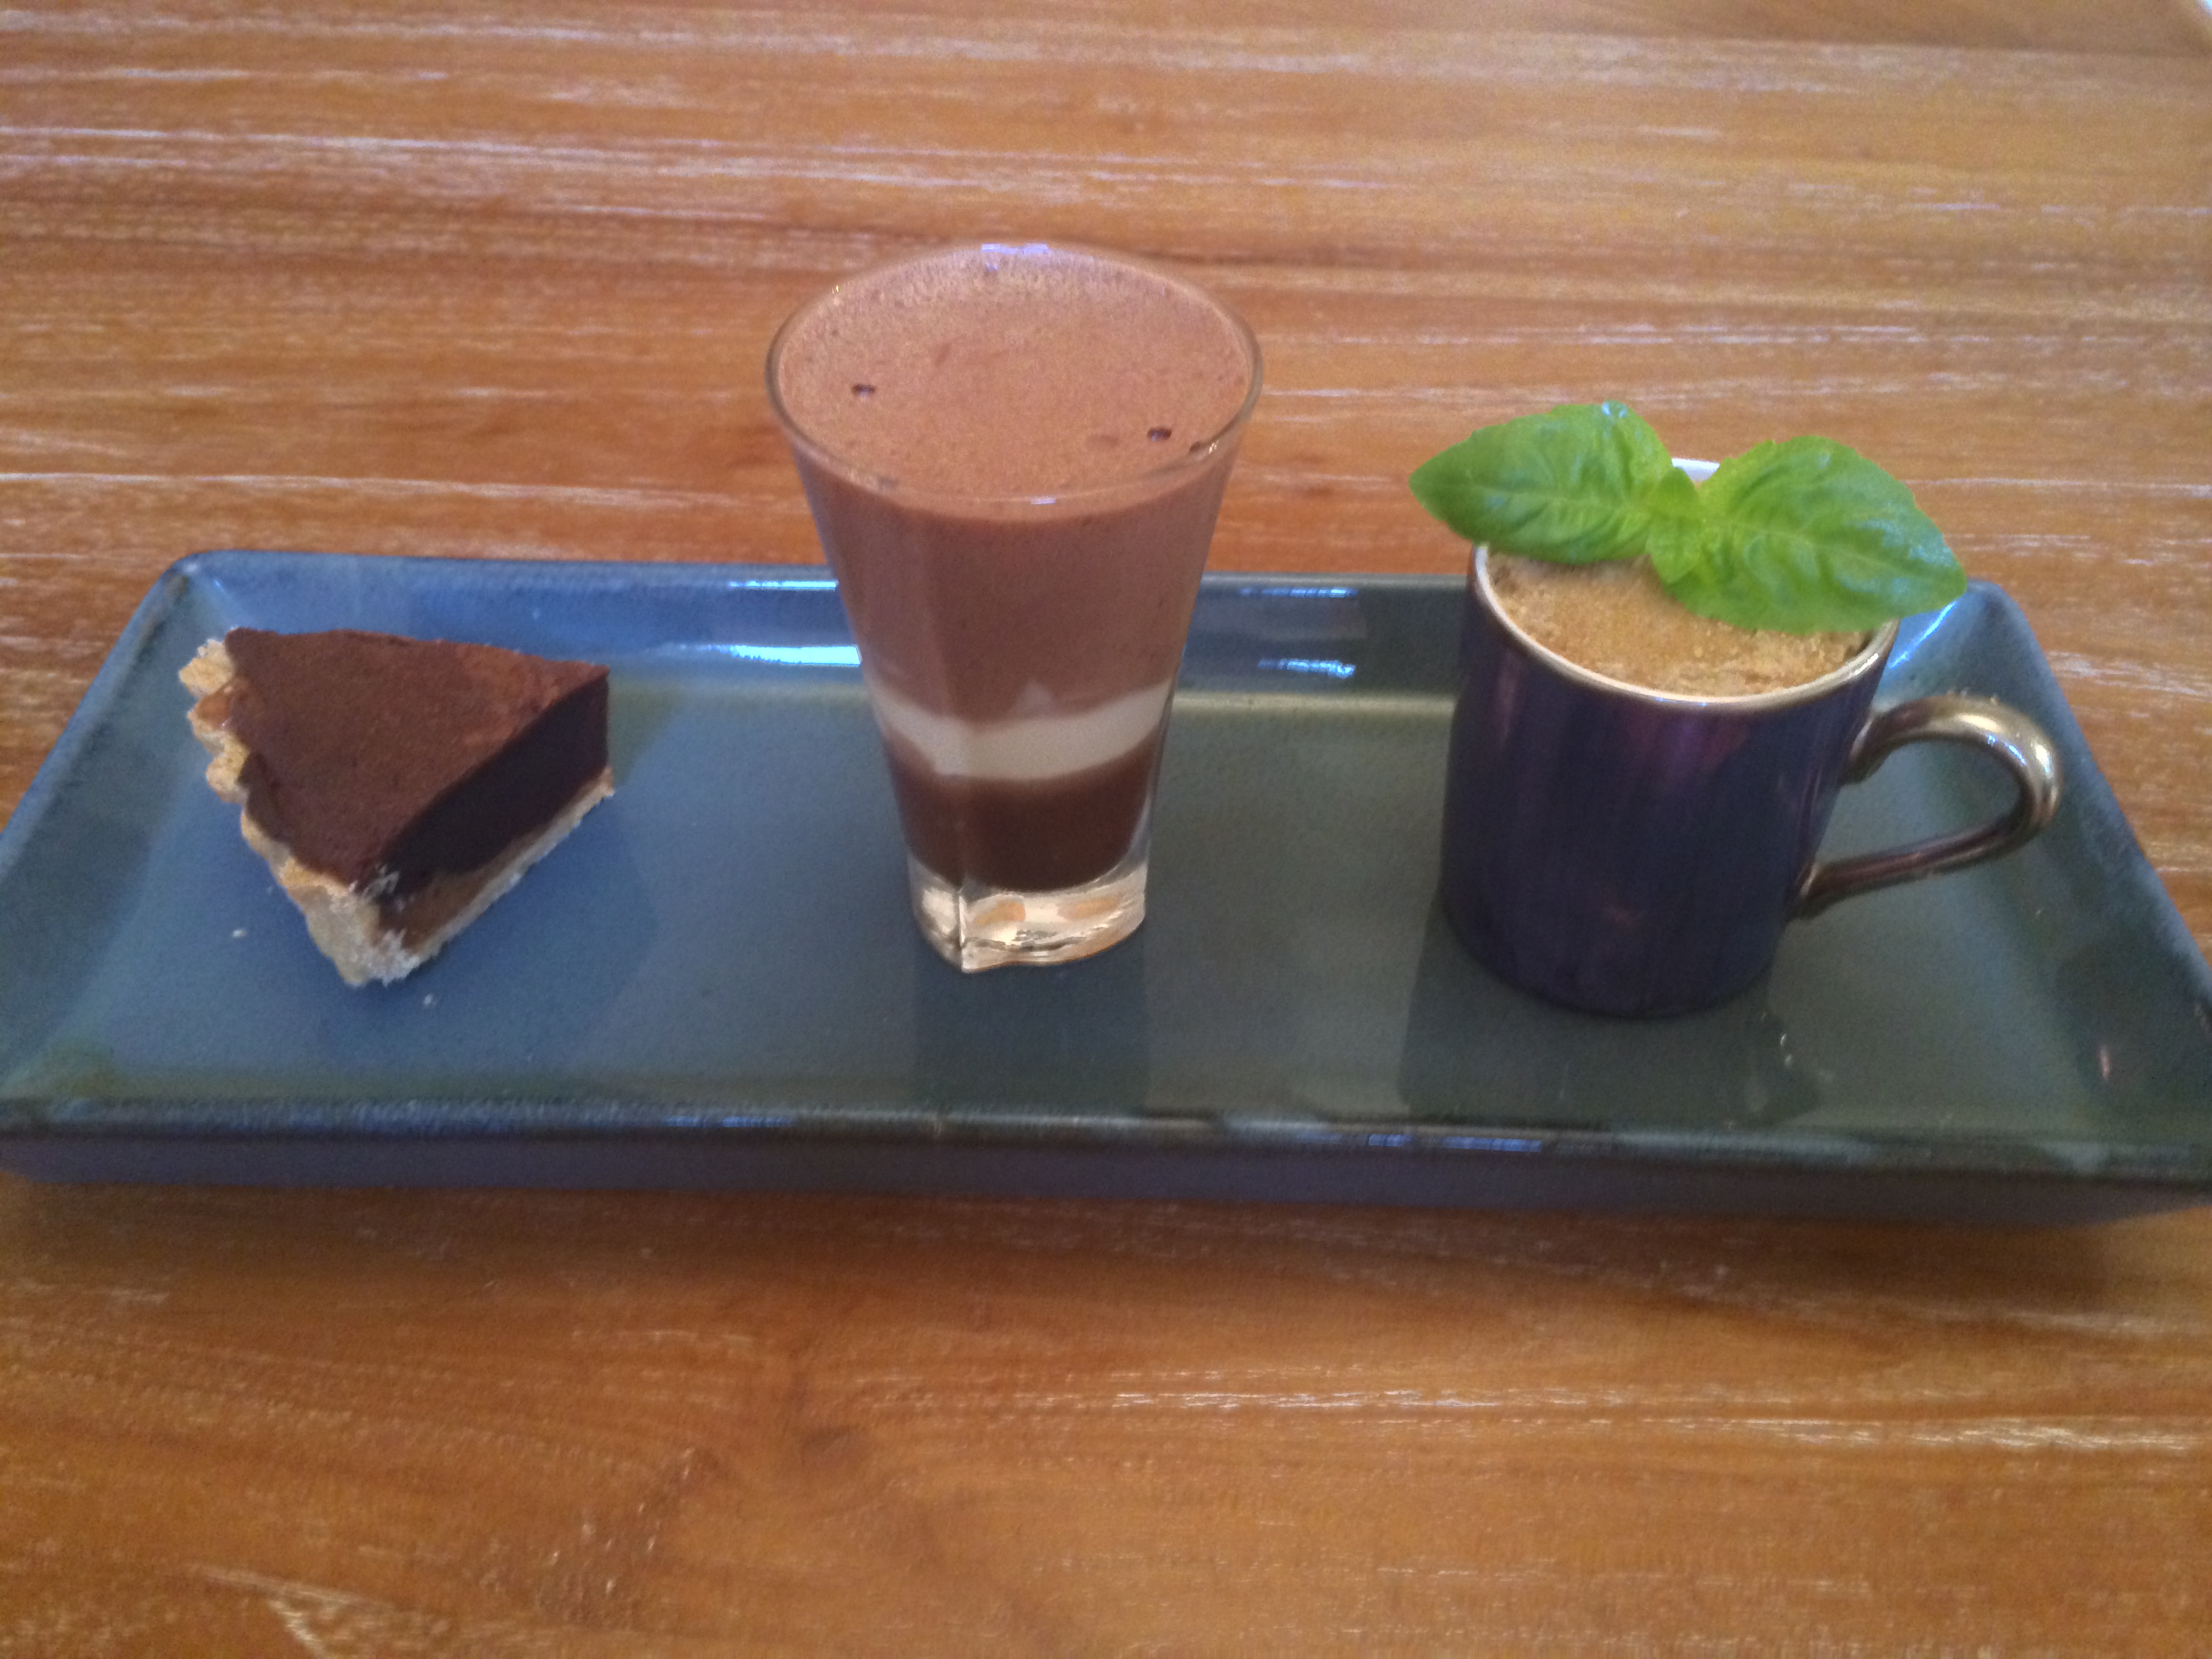
These little cakes, which are sort of a cross between a fairy cake and a cupcake came about because  we have friends coming for lunch on Monday (a bank holiday) and their youngest daughter can’t eat dairy. I still wanted to treat everyone to something indulgent so I decided to try making  vegan gluten free fairy cakes with chocolate frosting. I used the recipe on the back of the Doves Farm flour packet as my starting point and added a few tweaks (the Kinako for one), plus my own icing which is based on the Hummingbird Bakery frosting recipe and is amazing. I think they turned out really well – light but moist with a beautiful caramel undertone. I think my kids liked the frosting best, but then they always do.

Ingredients:

  • 100g dairy free spread  [I recommend using ‘Pure’ sunflower spread. It tastes and bakes the best of the most commonly available dairy free spreads. Pure also do a soya and olive version but don’t get those they don’t bake well]
  • 100g caster sugar
  • 1 teaspoon of baking powder
  • 1 teaspoon of vanilla paste or extract
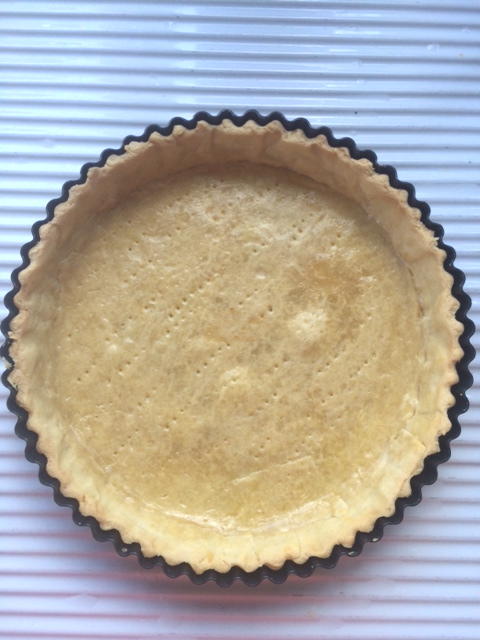
  • 50g gluten free self raising flour blend (I use and recommend Doves)
  • 25g ground almonds
  • 35g Kinako flour (or omit this and just use 85g Self Raising Doves flour blend). You can buy Kinako from Souschef.com or from JapanCentre.com
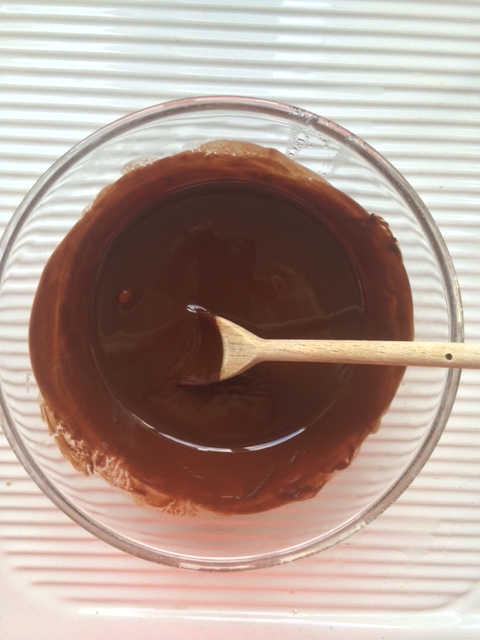
  • 25g chickpea (or ‘gram) flour mixed with 4 tablespoons of water (this replaces the egg)
  • 3 tablespoons of dairy free milk. I use Koko coconut drink; you could use soya milk or almond milk. I think the Koko cooks best and you can’t taste it in the finished result.

Method:

  1. Pre-heat your oven to 180 fan
  2. Cream together the sugar and dairy free spread (I use a free standing mixer)
  3. Mix in the chickpea (gram) flour mixed with the water
  4. Mix in the dairy free milk and then the vanilla
  5. Mix in the flours, baking powder and ground almonds (I should tell you to sieve the flour but tbh I rarely bother)
  6. You could add some dairy free chocolate chips at this point if you fancied
  7. Half fill 12 cupcake cases with the batter
  8. Bang the baking tray down on your work surface a couple of times
  9. Cook the cakes for 18 minutes or until golden and an inserted cake tester comes out clean.

For the frosting:

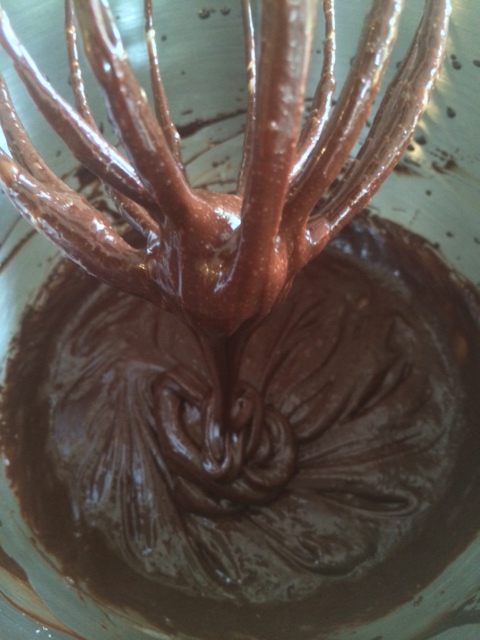
Beat together (I use a free standing electric mixer with a paddle attachment but you can use a hand held electric whisk) 100g of dairy free spread (again I use Pure sunflower), 300g of icing sugar ad 40g of gluten free cocoa powder (I used Green and Blacks). If you’re using a free standing machine set it on medium slow until the mixture comes together then turn it down to slow and add 40ml of dairy free milk one tablespoon at a time. Then turn the speed up to high and beat the icing until it’s light and fluffy.

Pipe the icing onto the cooled cakes with a swirly flourish and serve.

vegan gf fairycakes 2

Chocolate, Chai Spiced Pumpkin Pie with an Oreo cookie crust

pumpkin pie 4

Yesterday was Thanksgiving and I went to my first ever Thanksgiving dinner party, cooked and hosted by a lovely American friend. Apparently Thanksgiving is bigger than Christmas in the States and they make as much effort with this meal as we do our Christmas food. Traditional Thanksgiving dinner consists of roast turkey, sprouts with bacon, creamed sweetcorn, mashed sweet potato with lots of cinnamon in it, cranberry sauce, carrots, stuffing and gravy. It’s similar to our Christmas meal but much, much sweeter.  For dessert they have pumpkin pie. More orange puree. I had volunteered to make the dessert for last night’s dinner but I just couldn’t face a traditional pumpkin pie because I can’t stand the taste of pumpkin, so I created this riff on the original. I added chocolate and salt to the crust and filling and chai spices to the filling. The Americans add ginger, cinnamon and cloves to their pie so chai was a good fit (although I did leave out the cardamom). I used Nigella Lawson’s salted Oreo crust (from her new book) instead of pastry because I wanted something with more depth and texture as a foil for the blandness of the pumpkin. And because I was using a biscuit crust I didn’t want to have to cook it, so it’s actually really easy to make and no baking involved.

For maximum wow factor serve it, as I did, with the chocolate sauce (recipe below) and some caramel and chocolate chip ice cream (I’m posting the recipe for that in the near future, but in the meantime you could happily just soften some top quality vanilla ice cream, drizzle in some dulce de Leche or tinned Carnation Caramel and throw in some dark chocolate chopped up into very small pieces, run a fork through it to get a marbled effect from the caramel and freeze until ready to serve).

It was delicious and even my highly sceptical non pumpkin loving friend (not the American I hasten to add) said, in a very surprised voice “I like it!”

Ingredients

For the crust:

  • 2 packets of Oreo biscuits
  • 50g dark chocolate
  • 50g soft unsalted butter
  • 1/2 a teaspoon of smoked sea salt flakes (add them whole, not crumbled; you could happily use regular sea salt flakes, just don’t use table salt)

For the filling:

  • 1 can of Libby’s pumpkin puree (Waitrose stock it)
  • 100 grams dark chocolate  with min. 70% cocoa solids
  • 1 teaspoon of vanilla paste (I’ve recently discovered this. They all use it on Bake Off; you can just use vanilla extract but the paste has a deeper flavour)
  • 4 teaspoons of cocoa powder, sieved
  • 2 tablespoons of caramel (Dulce de Leche or Carnation is fine)
  •  70g dark brown muscovado sugar
  • 2 teaspoons of butter
  • ¾ teaspoon smoked (or regular) sea salt flakes
  • 3 teaspoons or 15g  cornflour
  •  40 ml full fat milk
  •  300 ml double cream
  • 1 chai teabag (I used Tea Pigs; their spices are whole so it was easy to take out the cardamom)
  • 1 sachet of  ‘Drink me chai’ Chai Latte powder

Method (for the crust):

  1. Break up the biscuits and put them into a food processor with the chocolate (also broken up) then blitz them together until you have crumbs.
  2. Add the butter and salt and blitz again until the mixture starts to clump together.
  3. Press the mixture into a large, round fluted tart tin and pat down on the bottom and up the sides of the tin with your hands and the back of a spoon (I used a bit of both), so that the base and sides are evenly lined and smooth. Put into the fridge to chill and harden for at least 1 hour (2 hours if your fridge is full).

For the filling:

  1. Melt the chocolate (broken up into small pieces) in a bain marie or in the microwave.
  2. In a food processor whizz together the pumpkin puree, muscovado sugar, caramel, butter, salt, cocoa powder and vanilla.
  3. Transfer the mixture to a large bowl and stir in the melted chocolate.
  4. Slake the cornflour – put it into into a cup and stir in the milk until smooth.
  5. Pour the cream into a heavy-based saucepan, open the chai teabag (take out the cardamom pod) and add the spices to the pan, along with 3 teaspoons of the Chai Latte powder. Heat the cream and spices gently for a few minutes.
  6. Add the cornflour and milk mixture to the cream and stir until the liquid is thick enough to coat the back of a spoon (if you run your finger down it, the two sides of the parting stay put).
  7. Take the thickened cream off the heat and sieve it directly into the pumpkin and chocolate mixture. Stir gently to combine. Taste it and add more Chai Latte or cocoa powder if desired.
  8. You want the mixture cool enough so it won’t melt the biscuit base when poured in so you could put a piece of damp baking parchment over the top of it to stop a skin forming and cool it down in the fridge if necessary. Otherwise just pour or spoon it into the set biscuit crust.
  9. Put pie into the fridge overnight to set.
  10. Take the pie out of the fridge about 5 minutes before you want to serve it – un-mould it by pushing the bottom up and out of the fluted ring (or stand it on something sturdy but smaller in circumference and gently push the fluted ring down and leave the base on).
  11. You can serve it as is, or with a dusting of sieved icing sugar, or as I did, with a squiggle of chocolate sauce over the top and lots more chocolate sauce over the ice cream. To make the chocolate sauce, melt 100g plain chocolate with 50ml whipping cream, add a very generous squeeze of golden syrup, a tablespoon of condensed milk, a scant tablespoon of butter and a pinch of salt and stir together. Taste and add more syrup/condensed milk if desired. To achieve the perfect consistency for drizzling/squeezing over your pie you may need to add some milk to thin it – use your judgement.

As mentioned above, it goes exceedingly well with choc chip caramel ice cream too and makes for an utterly divine pud! Very yummy indeed.

slice of pie 1

Salted caramel chocolate tart

tart 2  tart on table

As promised, the salted caramel chocolate tart I made for last week’s party. It’s a recipe very dear to my heart as it got me onto Masterchef. I made a trio of chocolate puds for my filmed audition – salted caramel dark chocolate tart, milk chocolate mousse layered with mascarpone cream and a basil infused raspberry and white chocolate cheesecake (the cheesecake didn’t set so I served it upside down in an espresso cup):

qualifing dishes

I’ll post the recipe for all three at a later date, but in the meantime here is the salted caramel chocolate tart. The recipe comes from Rachel Allen (famous Irish TV cook; think blond, Irish Nigella) and is difficulty level ‘high’. But so, SO worth it. Hell it’s a Masterchef level dish so if you really want to impress anyone, this is definitely worth doing. (I’ve yet to come across anyone who didn’t swoon with delight upon eating it).

Ingredients:

For the sweet shortcrust pastry

  • 200g plain flour
  • 100g chilled butter (cubed, plus extra for greasing)
  • 1 tablespoon of icing sugar
  • a lightly beaten (large) egg

For the caramel:

  • 225 g caster sugar
  • 100 g chilled butter (cubed)
  • 100ml double cream
  • 1 heaped teaspoon of sea salt flakes

For the chocolate layer:

  • 100g caster sugar
  • 2 eggs
  • 2 egg yolks
  • 250g dark chocolate
  • 150 g butter (cubed)

Method:

For the sweet shortcrust pastry:

1) Pulse the flour, butter and icing sugar in a food processor briefly until the butter is in small lumps. Add half the beaten egg and continue to whiz for another few seconds or until the mixture looks as though it may come together when pressed. Prolonged processing will only toughen the pastry, so don’t whiz it up until it is a ball of dough. You may need to add a little more egg, but not too much as the mixture should be just moist enough to come together.

If making by hand, rub the butter into the flour and icing sugar until it resembles coarse breadcrumb,s then using your hands add just enough egg to bring it together.

Reserve any leftover egg to use later.

2) With your hands, flatten out the ball of dough until it is about 2cm thick, then wrap in cling film or place in a plastic bag and chill in the fridge for at least 30 minutes.

3) After 30 minutes, butter a 23cm deep loose-bottomed, fluted tart tin and remove the pastry from the fridge. Roll it out to fit the tart tin, no thicker than 5mm. Rachel recommends putting it in between two sheets of clingflim but I’ve tried this and it makes rolling the pasty bloody difficult. I’d suggest just using enough flour on your surface and rolling pin to keep it from sticking.

4) Once your pastry is large and thin enough to fit your tart tin, roll it up round the rolling pin. Then unroll it over the tart tin, with the tin centrally beneath the pastry. Press the pastry into the edges of the tin (a good trick for doing this is to use a small ball of the pastry as a damper, rather than your fingers). Then using your thumb, ‘cut’ the pastry along the edge of the tin (press down onto the edge of the tin and the excess pastry falls away) for a neat finish. Prick the base all over with a fork and chill the pastry in the fridge for another 30 minutes or the freezer for 10 minutes.

5) Meanwhile, preheat the oven to 180C/fan 160C/gas 4. Remove the pastry from the fridge and line with foil, greaseproof paper or baking parchment, leaving plenty to come over the sides. Fill with baking beans or dried pulses, then place in the oven and bake blind for 15–20 minutes or until the base of the pastry case feels dry. Remove from the oven, take out the baking beans and foil/paper, brush the base of the pastry with any leftover beaten egg, and cook in the oven for another 3 minutes or until lightly golden. Remove from the oven and set aside:

tart 13

For the caramel:

6) Put the sugar and 75ml water into a heavy-based saucepan over a low heat and stir until the sugar dissolves. Add the butter and stir until it melts. Increase the heat to medium and allow to bubble away, stirring occasionally, for about 15 minutes or until the mixture is a light toffee colour. Mix in the cream and sea salt and boil for another 2–3 minutes until slightly thickened. Allow to cool. (NB this sounds straightforward. It is *not*. You need to stand over the molten sugar and butter, stirring and watching like a HAWK. The first time I did it it took me four gos to get it right. It burns and crystallises very, very quickly. Take it off the heat as soon as it is toffee coloured or it will burn and crystalise and you’ll have to start again).

For the chocolate layer:

7) Whisk the sugar, eggs and egg yolks until thickened and creamy in colour. Gently melt the chocolate and butter together in a bowl over a saucepan of simmering water. Leave to cool for a minute and then add this to the sugar and egg mixture and whisk until glossy:

tart 10tart 8

8) Spread the caramel over the cooled pastry base:

tart 11

9) Spoon over the chocolate mixture, spreading it evenly.

tart 5

10) Bake in the pre-heated oven for about 20 minutes or until it is almost set but still a bit wobbly. Allow to cool in the tin for 40–45 minutes before removing from the tin and serving in slices. Yum (and then some!)

tart1 tart fianl

[Some people like to put cream over their slices. I think that is inherently wrong as you don’t need it, but each to their own.]

tart with cream

me with tart

Gluten free ‘petticoat tail’ shortbread biscuits

final biscuit

My mother does not approve of shortbread. It is the fact that it is entirely comprised of butter, sugar and flour. She prefers her homemade biscuits to have oats, seeds and dried fruits in so as to offset their calorific burden with a nutritional bonus. But my children and I care little for that and find the particular synergy of fat and sugar in a shortbread biscuit a sheer and utter delight. And it works wonderfully well in a gluten free format so we make it a lot. Delilah has a ‘tribe’ fundraiser at school tomorrow. There is to be some biscuit decorating going on so I’ve made some petticoat tails to send in with her so she doesn’t miss out on the fun.

One thing my mother and I do agree on is the use of salted butter in baking. She never uses unsalted butter, reasoning that if you’re going to add a pinch of salt to the mixture anyway, why go to the bother of buying separate butter? I didn’t have any unsalted butter in tonight so I used salted and it works wonderfully well here, not least as you sprinkle them with delicious golden caster sugar anyway, and isn’t everything sweet ‘salted’ in some way these days? It really does enhance the flavour.

One word of warning, these biscuits will spread A LOT whilst baking so go with it when I say make the dough cake thick; it needs it or they melt away to nothing and you want a shortbread biscuit that you can sink your teeth into. It is a fabulous recipe though, the cornflour makes them wonderfully light, and gluten free or not they are a damn fine biscuit. In my humble opinion.

You could of course just make them into rounds (each to their own) but the kids and I find their triangular heart shapedness particularly pleasing.

Ingredients:

  • 230g gluten free flour
  • 110g cornflour
  • 110g icing sugar
  • 230g room temperature butter (salted or unsalted), cubed

Method:

Pre-heat your oven to 180c (fan)

1) Sieve the dry ingredients together into a large bowl

2) Rub in the chopped butter with your fingers

3) When all the butter is rubbed in, press it all together to make one big ball of dough:

shortbread dough

4) Wrap the ball in clingfilm and put it in the fridge for 20 minutes or so.

5) After 20 minutes roll out the dough on a lightly gluten free floured surface. Be careful, as it will crack so you need to be very gentle with it and shape and form it with care. You want to end up with a nice thick round cake shape, 2 cm high by 18 cm in diameter:

dough cake

6) Take a sharp knife and bisect the cake 4 times to demarcate 8 triangles. Then take a fork and with the tines facing down, gently impress the ends of the tines against the edges of the dough like so:

dough cake 2

I used the index finger of my other hand to press the edge of the dough in whilst pressing down with the fork as it is quite crumbly.

7) Then cut the triangles out and place them onto two baking trays lined with baking parchment (4 on each, with lots of space between so they don’t spread into each other):

triangles

8) Bake in the oven for 15-20 minutes.

9) Take out and after a couple of minutes transfer to a wire cooking rack and sprinkle them with golden caster sugar (or regular caster sugar if that’s what you have). They will be very crumbly whilst still hot, but once cooled they do firm up.

cooling cookies

They’re probably best eaten the next day/later in the afternoon once completely cooled and firm. Yum!

Salted caramel nut brittle

image

It’s half term. It’s a bank holiday weekend (woo!). We’re off to visit friends in Wiltshire tomorrow and I’ve made some chunky nut brittle to take as a gift. I’ve therefore burnt my arm because I always, ALWAYS burn myself when I boil sugar. Be warned. But it’s worth it. This salty, sweet, nutty chunk of deliciousness is one of my favourite things to nibble with coffee after dinner. And it’s perfect for wrapping up in cellophane with a nice bow and giving as a present. Just make sure you wait until it’s completely cold before you try any. Tempting though it may be, molten sugar is bloody lethal.

Ingredients:

  • 150g caster sugar
  • 80g roasted salted peanuts (or cashews if you prefer)
  • 80g  almonds (unroasted)
  • 80g walnuts or pecans (also unroasted)
  • 2 teaspoons of sea salt
  • 1 teaspoon of regular (fine grain) salt

Preheat the oven to 200C/180C fan.

1) Toast the nuts on a baking tray in the oven for about 8 minutes until they are golden and beautifully scented.

nut brittle 4

2) Put some baking parchment onto a baking tray or large wooden chopping board.

3) Tip the sugar into a large heavy bottomed saucepan, along with 3 tablespoons of water. Swirl the pan to get all the sugar wet (add more water if necessary).

4) Heat the sugar on a highish heat until it dissolves. Don’t, whatever you do, stir the sugar, just swirl the pan every now and then (more so towards the end). nut brittle 3

5) Once the caramel has turned a lovely clear golden brown (probably after about 6-7 minutes) take the pan off the heat and stir in the nuts and sea salt. nut brittle 2

6) Pour out onto the prepared baking parchment. Use a large spoon or forks or whatever you have to hand to spread it out as evenly as you can. You’ll need to move fairly swiftly as it sets really quickly. Sprinkle over the regular (fine grain) salt.

7) Leave to cool and set hard. Then break it up as gently as you can into bite sized pieces.

Yum!